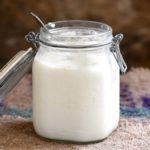
A Comprehensive Guide to Making Perfect Homemade Yogurt
Why Homemade Yogurt is a Game-Changer
Yogurt is a staple in many households, celebrated for its creamy texture and health benefits. But did you know that making yogurt at home is not only cost-effective but also incredibly satisfying? With just two basic ingredients and a few simple steps, you can create thick, luscious yogurt bursting with probiotics and flavor. No fancy equipment or store-bought cultures are necessary. Let’s dive into the ultimate guide to making yogurt that’s just as delicious as any you’d find in a store, if not better.
Benefits of Making Yogurt at Home
Homemade yogurt offers several advantages:
Cost-Effective: Store-bought yogurt can be pricey, especially if you’re buying organic or specialty varieties. Making it at home saves money.
Customizable: From the type of milk to added flavors, you control every aspect.
Probiotic Power: Fresh yogurt is rich in live cultures that support gut health.
No Preservatives: Unlike some store-bought options, homemade yogurt is free from additives and artificial sweeteners.
The Science Behind Yogurt Making
Making yogurt involves fermenting milk with live bacterial cultures. The bacteria feed on the lactose (natural sugar in milk) and convert it into lactic acid, which thickens the milk and gives yogurt its tangy taste. The key to perfect yogurt lies in maintaining the right temperature and time for fermentation.
Essential Ingredients for Homemade Yogurt
Milk: Use any milk you prefer, such as whole milk, raw milk, goat’s milk, or even lactose-free options. Note that ultra-high-temperature (UHT) pasteurized milk may not yield the best results.
Yogurt Starter: This can be store-bought plain yogurt with live cultures or a portion of your previous homemade batch.
Optional Add-Ins: Skim milk powder (2 tablespoons) can be used to enhance protein content and thickness.
Tools You’ll Need
Saucepan
Whisk
Thermometer (recommended for accuracy)
Glass jar or container
Clean towel or lid
Warm environment for incubation (e.g., an oven with the light on, a yogurt maker, or a thermos)
Step-by-Step Instructions
1. Heating the Milk
Pour 2 cups of milk into a saucepan and slowly heat it to 180°F (80°C).
Stir occasionally to prevent scalding and ensure even heating.
Heating helps denature the whey proteins, resulting in thicker yogurt.
2. Adding Skim Milk Powder (Optional)
If desired, whisk in 2 tablespoons of skim milk powder once the milk reaches 180°F.
This step is optional but adds creaminess and boosts protein content.
3. Cooling the Milk
Remove the saucepan from heat and let the milk cool to 105°F (40°C). You can speed up this process by placing the saucepan in a cold water bath.
4. Adding the Yogurt Starter
Stir 2 tablespoons of yogurt with live cultures into the cooled milk. For store-bought yogurt, you may use up to 4 tablespoons for stronger cultures.
Mix gently but thoroughly to distribute the cultures evenly.
5. Incubating the Yogurt
Pour the mixture into a clean glass jar or container.
Cover the jar with a clean towel or lid to retain warmth.
Keep the yogurt at a steady temperature of 110°F (40°C) for 4-24 hours. The longer the fermentation, the tangier the yogurt.
6. Cooling and Storing
Once the yogurt has set to a pudding-like consistency, transfer it to the refrigerator.
Refrigerate for a few hours to thicken further.
Tips for Success
No Thermometer? Heat the milk until frothy and cool it until it feels warm but not hot to the touch.
Temperature Control: Use a yogurt maker, wrap the jar in a towel, or place it in an oven with the light on for steady warmth.
Custom Flavors: Add vanilla extract, fresh fruit, or honey after fermentation.
Cream-Top Yogurt: Use non-homogenized milk or add a few tablespoons of cream before fermenting.
How to Make Greek Yogurt
For thicker Greek yogurt, strain your homemade yogurt using a cheesecloth or fine mesh strainer for several hours. The whey will drain out, leaving you with creamy, protein-rich yogurt cheese.
Common Mistakes to Avoid
Skipping Heating: While optional, skipping this step may result in runny yogurt.
Incorrect Temperature: Too hot or too cold, and the cultures may not thrive.
Dirty Equipment: Ensure all tools are clean to avoid contamination.
Creative Ways to Enjoy Homemade Yogurt
Mix with granola and berries for breakfast.
Use as a base for smoothies.
Substitute for sour cream in recipes.
Create savory dips with herbs and spices.
Storage and Shelf Life
Homemade yogurt can be stored in the refrigerator for up to two weeks. Remember to reserve a portion as a starter for your next batch.
Simple Step-by-Step Recipe
Quick and Easy Homemade Yogurt Recipe
Ingredients:
2 cups of milk (whole, raw, goat’s, or lactose-free)
2 tablespoons yogurt with live cultures
Optional: 2 tablespoons skim milk powder
Instructions:
Heat milk to 180°F (80°C), stirring occasionally.
Whisk in skim milk powder (optional) for extra thickness.
Cool milk to 105°F (40°C).
Stir in yogurt starter (2-4 tablespoons).
Pour mixture into a glass jar and cover.
Keep at 110°F (40°C) for 4-24 hours.
Refrigerate until fully chilled and thickened.
Enjoy your homemade yogurt plain, or add your favorite toppings and flavors!
