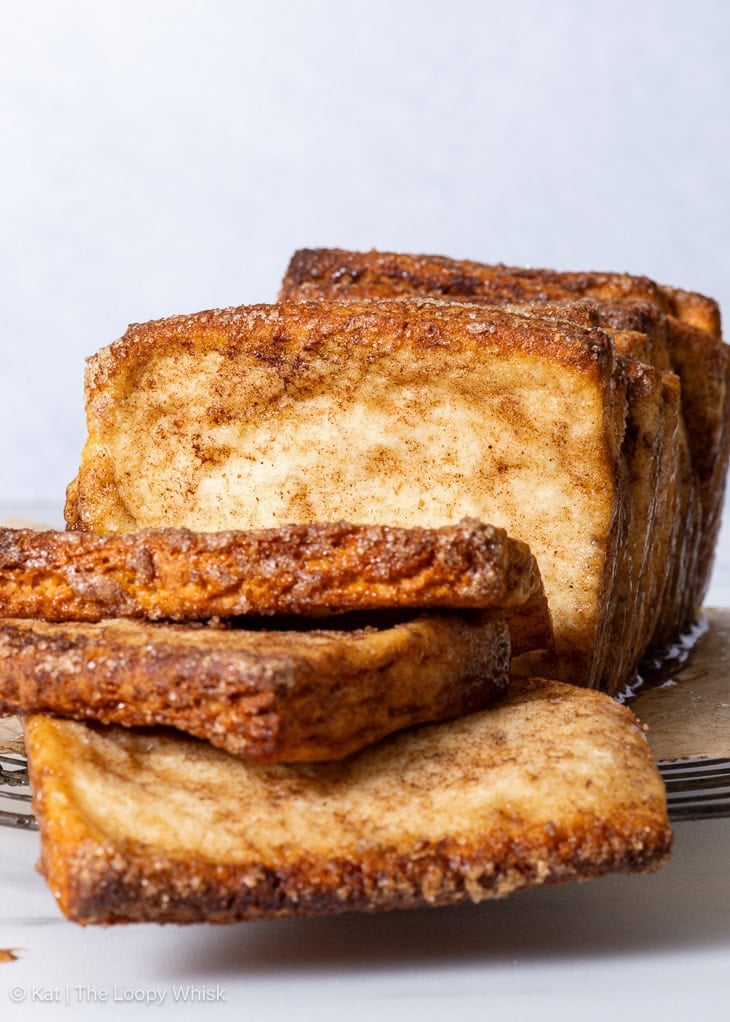
This gluten free cinnamon pull-apart bread combines layers upon layers of pillowy-soft, fluffy brioche dough with a simple cinnamon sugar filling. It’s super easy to make: the dough handles beautifully and there’s no complicated shaping required. The end result tastes like a cross between cinnamon rolls and monkey bread, and even non-gluten-free folks will absolutely love it – it’s THAT good.
PREPARATION TIME;
Ingredients
Gluten free brioche dough:
- 15 g (3 tbsp) whole psyllium husk (If using psyllium husk powder, use only 13g.)
- 180 g (¾ cup) lukewarm water
- 160 g (1⅓ cups + 1 tbsp) tapioca starch (You can use an equal weight of arrowroot starch, cornstarch (US)/cornflour (UK) or potato starch instead.)
- 135 g (1 cup) millet flour, plus extra for flouring the surface (You can use an equal weight of finely milled/ground brown rice flour instead.)25 g (3 tbsp) sorghum flour
- (You can use an equal weight of light buckwheat flour, white teff flour or oat flour instead. Use the latter only if you’re not sensitive to oats.)
- 50 g (¼ cup) caster/superfine or granulated sugar
- 6 g (2 tsp) instant yeast (If using active dry yeast, use 8g.)
- 6 g (1½ tsp) baking powder
- 5 g (2 tsp) xanthan gum
- 5 g (1 tsp) salt
- 100 g (⅓ cup + 1½ tbsp) whole milk, lukewarm
- 1 US large/UK medium egg, room temperature
- 25 g (2 tbsp) sunflower oil, or other neutral-tasting oil of choice
Cinnamon-sugar filling:
- 150 g (¾ cup) granulated sugar
- 1 tbsp ground cinnamon
- 55 g (½ stick) unsalted butter, melted
Instructions
Gluten free brioche dough:
- To make the dough, I recommend using a stand mixer fitted with the dough hook attachment. You can also make the dough by hand, but the mixer makes it much easier and results in a smoother dough.
- Make the psyllium gel: In a bowl, mix together the psyllium husk and lukewarm water. After about 30-45 seconds, a gel will form.
- In a large bowl or the bowl of a stand mixer (if using), whisk together the tapioca starch, millet flour, sorghum flour, sugar, instant yeast, baking powder, xanthan gum and salt.
Tip: If using active dry yeast instead, you need to activate it first. Mix it together with the lukewarm milk and a tablespoon of the sugar. Set aside for 5-10 minutes, or until the mixture starts frothing. Then, add it to the dry ingredients along with the rest of the wet ingredients.
- Add the milk, egg and oil to the psyllium gel, and mix well to combine.
- Make a well in the middle of the dry ingredients and add the psyllium gel-egg mixture.
-
Knead the dough until smooth and all the ingredients are evenly incorporated, then knead for a further 4-5 minutes (if using a stand mixer) or 6-8 minutes (if kneading it by hand). Use a rubber spatula to occasionally scrape along the sides and bottom of the bowl to prevent any dry patches of unmixed flour.
Tip: This extra kneading time will make the dough EXTRA smooth, which is the key to beautiful gluten free pull-apart bread.
-
The final dough will be slightly sticky to the touch – that’s okay, you’ll be working on a lightly floured surface so it shouldn’t be a problem. Resist the temptation to add more flour to the dough, as that can make the final bread too dense and dry.
Tip: If you find the dough too sticky to easily handle (even on a floured surface and with floured hands), you can chill it in the fridge for about 1 hour before proceeding to the next step. This will make the dough slightly less sticky and therefore easier to handle.
Assembling the pull-apart bread:
- Line a 9×5-inch (23x13cm) loaf pan with parchment/baking paper and set aside until needed.
- In a bowl or deep plate, mix together the granulated sugar and cinnamon until well combined, and set aside.
-
Turn out the dough onto a lightly floured surface and shape it into a ball.
-
Roll it out into a large 12-inch (30cm) square.
-
Using a pizza cutter or a sharp knife, divide the dough into 16 equal 3-inch (7.5cm) squares.
-
Dip each square first into melted butter and then into the cinnamon sugar, making sure that it’s evenly coated.
-
Stack the sugar-coated squares into two stacks of eight and carefully place them into the loaf pan (see blog post for photos). Don’t worry if the stacks aren’t perfectly neat – this is a rustic bake, it’s okay if it’s a bit wonky!
Proofing:
-
Lightly cover the bread with a sheet of plastic wrap/cling film (to prevent it from drying out) and proof in a warm spot until doubled in size, about 1 hour 15 minutes to 1 hour 30 minutes.
Tip: If your kitchen is on the cold side, put a cup of boiling hot water into your (turned-off) oven – that will create the perfect warm, slightly humid proofing environment.
Baking the cinnamon pull-apart bread:
-
Adjust the oven rack to the middle position and preheat the oven to 350ºF (180ºC).
-
Once doubled in size, place the pull-apart bread onto a baking sheet (to catch any drips), then place it into the oven and bake for about 40 minutes or until it’s evenly golden brown on top and an inserted toothpick or cake tester comes out clean with no sticky, raw dough attached to it.
If the top of the bread starts browning too quickly, cover it with a sheet of aluminium foil (shiny side up) and continue baking until done.
-
Allow the bread to cool in the loaf pan for about 15 minutes, then transfer it onto a wire rack to cool. Serve warm or cooled to room temperature.
Storage:
-
This gluten free cinnamon pull-apart bread is at its best fresh, on the day of baking, but it keeps well in a closed container in a cool, dry place for 2-3 days. I recommend reheating it either in the microwave or in a 350ºF (180ºC) oven before serving.
