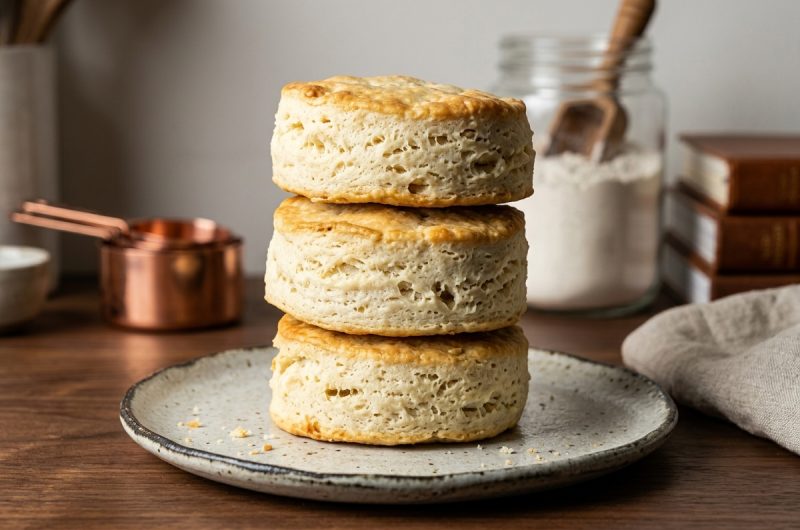
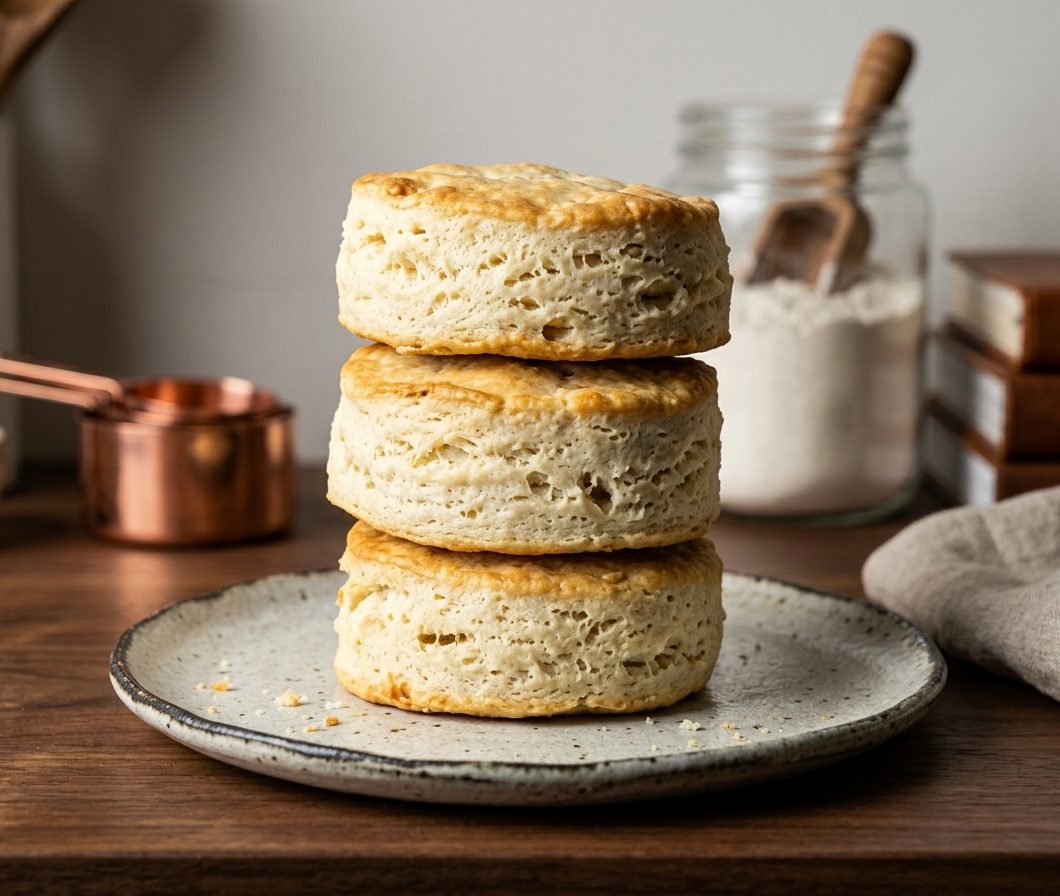
Gluten Free Biscuits are a simple homemade baking recipe that gives you tall, fluffy biscuits with a tender center and lightly golden outside. They are made with just five main ingredients and can be prepared and baked in less than 30 minutes. These biscuits are ideal for breakfast, lunch, dinner, or as an easy side dish served alongside soup, chicken, casseroles, or other comforting meals.
These Gluten Free Biscuits
Making gluten free biscuits at home is much easier than it may seem. The dough comes together quickly, and there is no yeast, long rising time, or complicated preparation involved. The most important part is keeping the butter very cold and choosing a suitable gluten free baking flour blend. When these two details are handled correctly, the biscuits bake into a soft and tender texture with a beautifully golden exterior.
These homemade gluten free biscuits are also incredibly versatile. They can be served warm with butter, used to make breakfast sandwiches, filled with ham and cheese, served with sausage gravy, or transformed into a simple strawberry shortcake. Their sturdy texture makes them useful beyond the dinner table, while their soft interior keeps them enjoyable enough to eat on their own.
Ingredients for Gluten Free Biscuits
Gluten Free Baking Flour Blend
The gluten free flour blend is the foundation of this recipe. Different gluten free flour blends contain different combinations of starches and grains, so they can produce different results when baked. For this recipe, Cup 4 Cup Gluten Free Multipurpose Flour is highly recommended because it provides the desired texture, color, and rise.
If you choose another gluten free flour blend, make sure it is designed for baking and contains a suitable binder such as xanthan gum. Measuring the flour correctly is also important. Too much flour can make the dough dry and difficult to handle, which can result in biscuits that are heavier than intended.
Aluminum-Free Baking Powder
Baking powder helps the biscuits rise in the oven and gives them their fluffy interior. Aluminum-free baking powder is recommended because some varieties can leave a metallic flavor in baked goods. Use fresh baking powder for the best results and store it properly so it retains its effectiveness.
Butter
Cold butter is one of the most important ingredients for creating tender homemade biscuits. The butter is cut into small cubes and chilled in the freezer before being mixed with the flour. Keeping the butter cold helps create small pockets throughout the dough. During baking, those pieces melt and contribute to the biscuit’s tender texture and buttery flavor.
Salt
Salt enhances the overall flavor of the biscuits and balances the richness of the butter. Although the quantity is small, it is an important part of the recipe. Make sure the salt is evenly incorporated into the dry ingredients before adding the butter and milk.
Milk
Milk brings the flour and butter mixture together to form the dough. Whole milk is preferred for its flavor and texture, but other suitable options, including unsweetened almond milk, can also be used. Since gluten free flour blends vary in how much liquid they absorb, the milk should be added gradually.
How to Make Gluten Free Biscuits
Step 1: Preheat the Oven
Start by preheating the oven to 425 degrees. Line a quarter or half sheet pan with parchment paper and set it aside. A properly preheated oven is important because the biscuits need immediate exposure to strong heat to rise properly and develop a golden exterior.
Preparing the baking sheet before making the dough also makes the process easier. Once the biscuits are cut, they can be transferred directly to the prepared pan and baked without unnecessary waiting.
Step 2: Freeze the Butter
Cut the butter into 1/2-inch cubes and place the pieces in the freezer for approximately 20 minutes. The butter should be very cold before it is added to the flour mixture.
This short chilling step makes a noticeable difference in the finished biscuits. Warm butter can blend too thoroughly into the flour, while very cold butter remains in small pieces that help create a more tender texture as the biscuits bake.
Step 3: Mix the Dry Ingredients
If you are using a food processor, add the gluten free flour blend, aluminum-free baking powder, and salt. Pulse briefly until everything is combined. Add the chilled butter cubes and pulse again until the mixture resembles coarse crumbs.
If you prefer to work without a food processor, place the gluten free flour blend, baking powder, and salt into a large mixing bowl. Whisk them together, then add the cold butter. Use a pastry cutter to work the butter into the flour until coarse crumbs form.
Preparing the Biscuit Dough
Add the Milk Slowly
Once the butter has been incorporated, gradually drizzle the milk into the mixture while stirring gently with a fork. Continue adding and mixing until the ingredients begin to form a shaggy dough.
Do not automatically add all the milk at once. Gluten free flour blends can differ considerably in how much liquid they absorb. Adding the milk slowly gives you better control over the consistency and helps prevent the dough from becoming unnecessarily wet or sticky.
Avoid Overworking the Dough
When the ingredients come together, the dough does not need extensive kneading. Gluten free biscuit dough should be handled gently. Turn it onto a surface lightly dusted with gluten free flour and press it together until it becomes workable.
Overworking the dough can make shaping more difficult and may affect the tenderness of the finished biscuits. The goal is simply to bring the ingredients together and create a dough that can be pressed and cut.
Cutting and Shaping the Biscuits
Press the Dough
Gently press the dough until it is approximately 3/4-inch thick. Try to maintain an even thickness so the biscuits bake at a similar rate. The dough should be thick enough to produce tall biscuits rather than thin, flat rounds.
There is no need to roll the dough aggressively. Using your hands to press it gently is enough. This also keeps the preparation quick and minimizes unnecessary handling.
Cut the Biscuits
Use a 3-inch biscuit cutter to cut the dough into individual biscuits. Place each biscuit onto the parchment-lined baking sheet. Gather the remaining dough scraps and gently press them together to cut additional biscuits.
The recipe should produce approximately six to seven biscuits. When working with the scraps, handle them as little as possible. Repeatedly pressing and reshaping the dough can make the final biscuits less tender.
Baking Gluten Free Biscuits
Brush and Bake
Before baking, brush the tops of the biscuits with additional milk. Place the baking sheet in the preheated oven and bake for approximately 12 to 14 minutes.
Rotate the pan halfway through the baking time to encourage more even browning. The finished biscuits should be tall, golden brown, and cooked through. It is better to make sure the centers are properly baked rather than removing the biscuits too early.
Serve While Warm
Freshly baked gluten free biscuits are best enjoyed warm. Slice one open and add butter for a simple serving option. The contrast between the lightly crisp outside and soft center makes them satisfying without requiring complicated toppings.
They can also be served as part of a larger meal. Because the biscuits are sturdy enough to hold fillings, they can easily become the base for sandwiches or other dishes.
Ways to Serve Gluten Free Biscuits
Breakfast Sandwiches
Turn a warm biscuit into a filling breakfast sandwich by slicing it in half and adding cooked sausage, scrambled eggs, and American cheese. The biscuit provides a soft but sturdy base for the savory filling and makes a convenient handheld breakfast.
For a simpler option, serve the biscuits with butter alongside your usual breakfast. They can also be paired with other breakfast favorites when you want something warm and homemade on the plate.
Ham and Cheese Biscuits
For a quick lunch or dinner, split the biscuits and fill them with deli ham and sliced or shredded cheese. Heat them until the cheese becomes warm and melted. The combination of buttery biscuit, savory ham, and melted cheese makes an easy meal without requiring much additional preparation.
Biscuits and Gravy
These biscuits are also suitable for classic biscuits and gravy. Serve them with ground pork breakfast sausage gravy or shredded rotisserie chicken. The soft interior absorbs the flavorful gravy while the biscuit remains substantial enough to hold its shape.
Strawberry Shortcake
For a sweet option, use the biscuits as the base for strawberry shortcake. Split a warm or cooled biscuit and add your preferred strawberry topping. The tender biscuit provides a homemade alternative to traditional shortcake bases.
What to Serve With Gluten Free Biscuits
Soups and Stews
Gluten free biscuits make a useful side dish for soups and stews. Their soft centers are excellent for soaking up flavorful broth, while their golden edges provide a pleasant texture. Serve them alongside homemade chicken noodle soup, vegetable soup, hearty stews, or other favorite comfort-food recipes.
Chicken and Casserole Dishes
These biscuits pair naturally with chicken-based meals, including baked chicken, roasted chicken, chicken and noodles, and chicken pot pie-style dishes. They can also be served with shepherd’s pie, gluten free tuna noodle casserole, or gluten free macaroni and cheese for a filling family dinner.
How to Freeze Gluten Free Biscuits
Freezing Instructions
These biscuits can be prepared ahead and frozen for later. Allow the baked biscuits to cool completely before placing them into a gallon-size freezer bag. Remove as much excess air as possible, seal the bag, and freeze the biscuits flat.
Freezing the biscuits after they have completely cooled helps preserve their texture and prevents excess moisture from becoming trapped inside the storage bag. This makes them convenient for busy days when you need a quick homemade side.
Reheating Instructions
To reheat a frozen biscuit, wrap it in a paper towel and microwave it for approximately 25 to 30 seconds, or until warm. For a crispier finish, slice the biscuit in half after warming and place it in a toaster oven or under the broiler with the oven rack positioned in the center of the oven.
The reheating method can be adjusted according to the texture you prefer. Microwaving provides a soft and quick result, while toasting or broiling gives the cut surfaces a warmer, slightly crisp finish.
Notes for Making the Best Gluten Free Biscuits
Measure the Flour Carefully
Use the spoon-and-level method when measuring gluten free flour. Spoon flour into the measuring cup until it is slightly higher than the rim, then use the back of a knife to level the top. Avoid dipping the measuring cup directly into the flour container because this can pack in extra flour and change the consistency of the dough.
Keep the Butter Cold
Cold butter is essential for the texture of these biscuits. Freeze the cubed butter for about 20 minutes before adding it to the dry ingredients. Work quickly enough to prevent the butter from becoming soft while preparing the dough.
Choose the Right Flour
For the most consistent results, use Cup 4 Cup Gluten Free Multipurpose Flour as recommended. If using another gluten free flour blend, check that it contains a binder such as xanthan gum. Because different blends behave differently, the amount of milk required may vary slightly.
Do Not Add Too Much Milk
Add the milk gradually rather than pouring it in all at once. The goal is to create a workable, slightly shaggy dough. Depending on the flour blend, you may not need the entire cup of milk.
Gluten-Free Biscuits
 Recipe by admin1
Tall, fluffy, and tender homemade Gluten Free Biscuits made with five simple ingredients.
6
servings10
minutes14
minutes241
kcal24
minutesIngredients
2 cups gluten free baking flour blend, Cup 4 Cup HIGHLY recommended, see notes
1 Tablespoon aluminum-free baking powder, Bob’s Red Mill recommended
1 teaspoon salt
6 Tablespoons butter
1 cup milk, plus more for brushing, any kind, see notes
Directions
- Preheat the oven to 425 degrees. Line a quarter or half sheet pan with parchment paper and set it aside.
- Dice the butter into 1/2-inch cubes and place them in the freezer for 20 minutes. The butter should be very cold before being incorporated into the flour mixture.
- If using a food processor, add the gluten free flour blend, aluminum-free baking powder, and salt. Pulse to combine. Add the chilled butter cubes and pulse until the mixture resembles coarse crumbs. Transfer the mixture to a large mixing bowl.
- If using a pastry cutter instead, add the gluten free flour blend, baking powder, and salt to a large mixing bowl. Whisk to combine, then add the cold butter cubes. Cut the butter into the flour mixture until coarse crumbs form.
- Slowly drizzle the milk into the flour and butter mixture while gently stirring with a fork. Continue until the ingredients come together into a shaggy dough. Depending on the gluten free flour blend, you may not need the entire cup of milk.
- Turn the dough onto a surface lightly dusted with gluten free flour. Gently press the mixture together until it forms a workable dough. Press the dough to approximately 3/4-inch thickness.
- Use a 3-inch biscuit cutter to cut out the biscuits. Place them onto the prepared parchment-lined baking sheet. Gently press the remaining scraps together and cut additional biscuits. You should get approximately 6 to 7 biscuits.
- Brush the tops of the biscuits with additional milk. Bake for 12 to 14 minutes, rotating the baking sheet halfway through the cooking time. Bake until the biscuits are golden brown and cooked through. Serve warm.
Notes
- Cup 4 Cup Gluten Free Multipurpose Flour is highly recommended for the best results.
- If using another gluten free flour blend, make sure it contains a binder such as xanthan gum.
- Use the spoon-and-level method when measuring flour to avoid adding too much.
- Aluminum-free baking powder is recommended to prevent a metallic flavor.
- Whole milk provides excellent flavor and texture, although unsweetened almond milk and other suitable milk options can also be used.
- Add the milk gradually because different gluten free flour blends absorb liquid differently.
- Keep the butter very cold for the best biscuit texture.
- To freeze, cool the baked biscuits completely, place them in a gallon-size freezer bag, remove excess air, seal, and freeze flat.
- To reheat, wrap a frozen biscuit in a paper towel and microwave for 25 to 30 seconds or until warm. For a crispier finish, slice it in half and toast or broil until heated through.
Nutrition Facts
- Calories: 241kcal
- Fat: 13g
- Carbohydrates: 30g
- Fiber: 4g
- Sugar: 1g
- Protein: 4g