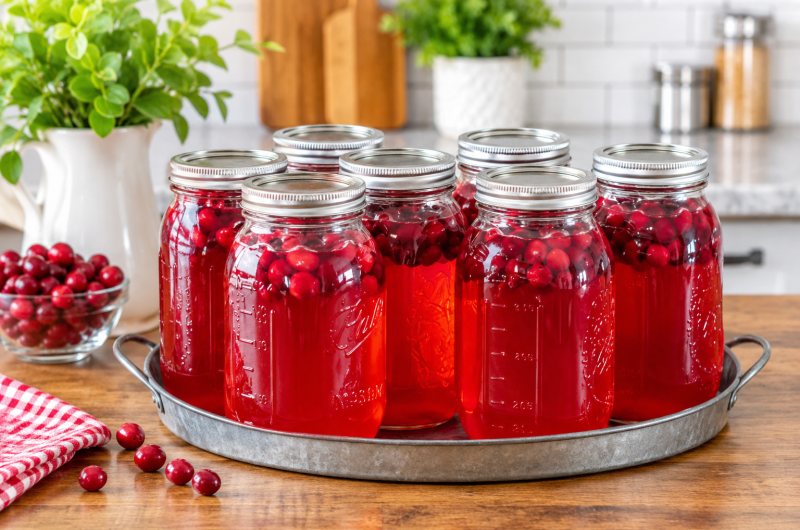
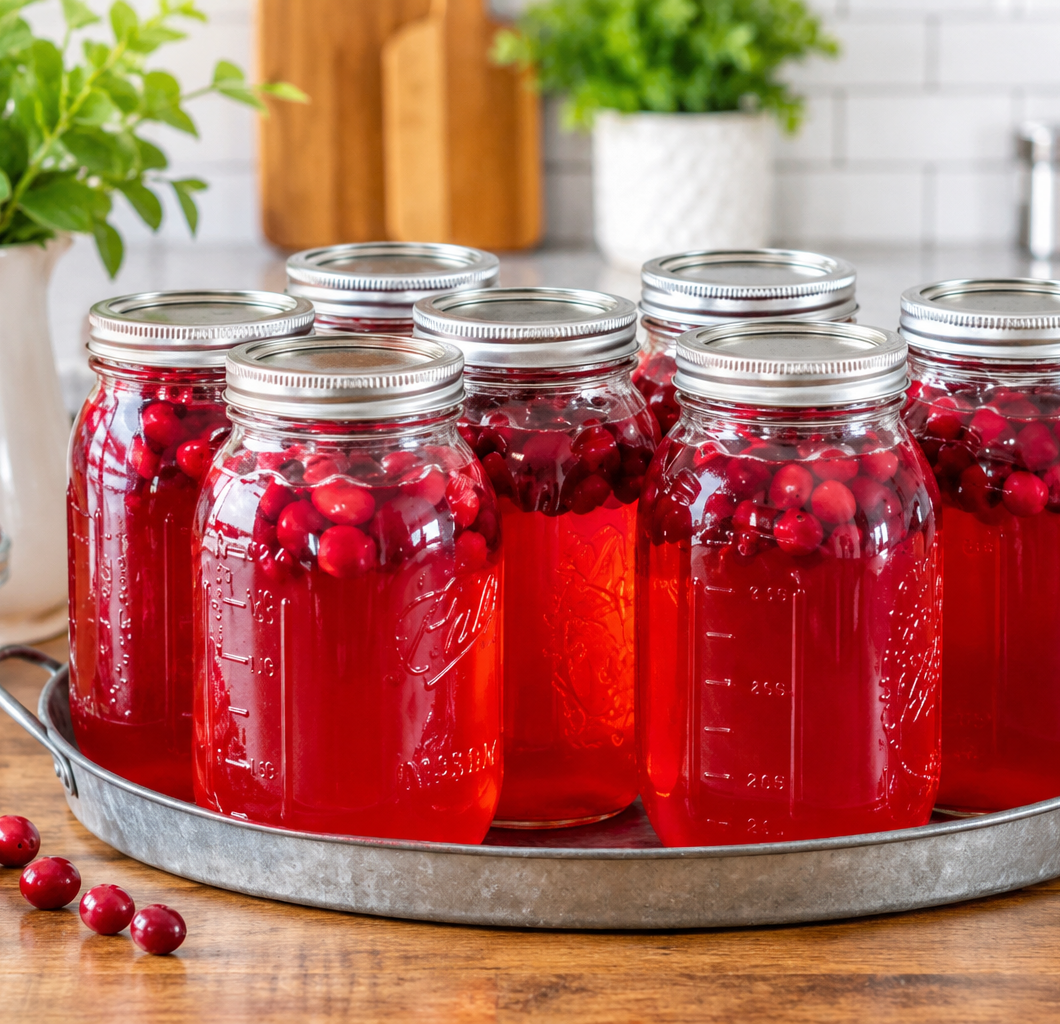
Homemade cranberry juice is a delicious way to enjoy the naturally bold, tangy flavor of fresh cranberries throughout the year. With just a few basic ingredients, including fresh cranberries, sugar, and water, you can prepare a flavorful cranberry drink and preserve it in glass canning jars.
This simple canning cranberry juice recipe is ideal for anyone who enjoys homemade beverages and wants to stock their pantry with seasonal favorites. The beautiful deep red color and refreshing tartness make it a lovely drink for everyday enjoyment, holiday gatherings, and special occasions.
Making cranberry juice at home gives you control over the ingredients and sweetness. Instead of purchasing commercial cranberry juice that may contain additional sweeteners, artificial flavors, or preservatives, you can prepare your own version using whole cranberries and your preferred sweetener.
The process is straightforward and does not require complicated equipment beyond basic water bath canning supplies. Once prepared, the jars can be stored according to safe canning guidelines, allowing you to enjoy homemade cranberry juice whenever you want a refreshing drink.
This Homemade Cranberry Juice Recipe
One of the best things about homemade cranberry juice is its simple preparation. You do not need an expensive juicer, blender, or complicated cooking method to extract the cranberry flavor. Whole cranberries are placed directly into clean quart canning jars, combined with sugar, and covered with water. The jars are then processed in a water bath canner, allowing the cranberries to release their natural color and flavor over time. This makes the recipe convenient for both beginners and experienced home cooks.
Another reason to make cranberry juice at home is the ability to adjust the sweetness. Cranberries naturally have a sharp, tart taste, so sugar helps balance their flavor while drawing out their juice. You can choose the sweetness level that suits your preferences, although the supplied recipe recommends at least ¼ cup of sugar per quart for the extraction process. Honey is also mentioned as an alternative sweetener, but any changes to sweetener amounts or types should be checked against a tested preservation recipe before canning.
This recipe is also a practical way to use fresh cranberries during their seasonal availability. Instead of preparing a single glass of juice, you can make several jars at once and build a supply for your kitchen. The finished cranberry juice can be enjoyed chilled, served over ice, or used as a flavorful base for other homemade drinks. Its rich color also makes it an attractive addition to a holiday beverage table.
How to Make Homemade Canning Cranberry Juice
Preparing cranberry juice in canning jars is simple, but each stage should be completed carefully. Start by washing and inspecting the cranberries, preparing the jars, and measuring the ingredients. Once everything is ready, you can assemble the jars and follow the appropriate water bath canning procedure.
Step 1: Wash and Prepare the Cranberries
Begin by measuring six cups of cranberries. Place them in a colander and rinse them thoroughly under clean running water. Move the berries around gently to remove dirt, leaves, small twigs, and other unwanted material. Carefully inspect the fruit and discard any cranberries that are bruised, excessively soft, or damaged.
Once the cranberries are clean, allow excess water to drain away. Preparing the fruit properly is an important first step because the berries will remain inside the jars during the preservation process. Clean, firm cranberries will provide a better starting point for your homemade juice.
Step 2: Add Cranberries to the Canning Jars
Place the prepared whole cranberries into clean quart canning jars. Divide the six cups of cranberries among the jars as evenly as possible. The berries will form the foundation of the juice and gradually release their natural flavor during the process.
The original instructions also mention that optional additions, such as spices, apple slices, or orange zest, can be included at this stage. However, these additions are not part of the main ingredient list. If you decide to experiment with extra ingredients, use a tested canning formulation to ensure that the finished product remains safe for preservation.
Step 3: Add the Sugar
Measure the sugar and distribute it among the jars. The recipe uses two cups of sugar in total, with approximately half a cup added to each jar in the original preparation example. You can adjust the sweetness of the drink to suit your taste, while keeping in mind the stated minimum of ¼ cup per quart for the extraction process.
The sugar helps draw liquid from the cranberries and creates a sweet syrup as the fruit releases its juice. It is normal for the sugar to settle toward the bottom of the jar during preparation. It will combine with the cranberry liquid as the contents develop over time.
Step 4: Fill the Jars With Water
Pour water into each jar until the cranberries and sugar are covered. Leave approximately half an inch of headspace between the liquid and the top of the jar. This space is important because the contents can expand during heating and processing.
Filtered water is a convenient choice if you prefer its taste, but suitable tap water can also be used. Pour slowly to avoid unnecessary splashing and make sure the jars are filled evenly. Follow the headspace requirements of the tested canning instructions you are using.
Step 5: Clean the Jar Rims and Add the Lids
Before closing the jars, carefully wipe their rims with a clean cloth to remove any sugar, water, or cranberry residue. A clean rim helps the lid make proper contact with the jar during sealing.
Place clean canning lids on the jars and secure them with screw bands. Tighten the bands until they are fingertip-tight rather than forcing them closed. Proper lid placement is important because a good seal helps protect the preserved contents during storage.
Step 6: Process the Jars in a Water Bath Canner
Place the filled jars into the water bath canner according to the equipment manufacturer’s instructions. The original recipe describes starting with cool water and ensuring that the water covers the jars by at least two inches. Bring the canner to a full rolling boil.
The supplied instructions specify a 20-minute processing period after the water reaches a boil. However, safe canning times and procedures depend on the exact tested recipe, jar size, altitude, and preparation method. The source instructions contain inconsistencies about pint and quart jars, so do not rely on the 20-minute time for quart jars without verifying it against an authoritative tested canning recipe. Use a process specifically validated for your jar size and altitude.
Step 7: Allow the Jars to Cool
Once the verified processing period is complete, remove the jars carefully using a jar lifter. Place them upright on a heat-safe surface, leaving enough space between them for air to circulate. Allow the jars to cool naturally without moving or tightening their screw bands.
As the cranberry juice develops, you may notice that the jar contents separate into different layers. Some sugar may settle toward the bottom, while the cranberry liquid and softened berries remain above it. This separation is normal for the preparation method described in the source and does not mean that the juice has failed.
Step 8: Check the Jar Seals
After the jars have cooled completely, check each lid to make sure it has sealed properly. A properly sealed lid should remain firmly attached and should not flex when pressed in the center. Any jar that has not sealed should not be treated as shelf-stable.
Remove the screw bands if appropriate for your tested canning procedure and inspect the seals. Label the jars with their preparation date and follow recommended storage guidance. Never store an improperly sealed jar at room temperature simply because the lid appears nearly closed.
Step 9: Let the Cranberry Juice Develop Its Flavor
The original recipe recommends allowing the jars to sit for approximately four to six weeks in a cool, dry place before opening. During this time, the cranberries continue to release their flavor into the liquid, while the sugar syrup combines with the extracted juice.
The color and flavor become more developed as the contents sit. Although the source mentions that the juice can be opened after only a few days, a longer resting period is recommended for a fuller flavor. Remember that shelf storage is appropriate only when the jars have been processed using a validated safe canning method.
Step 10: Strain and Serve
When you are ready to enjoy your homemade cranberry juice, open a jar and pour the contents through a fine mesh strainer. This removes the cooked cranberries and leaves the flavorful liquid ready to drink.
Serve the juice chilled in glasses or pour it over ice for a refreshing beverage. If the sugar has settled at the bottom, gently mix the liquid before serving so that the sweetness is distributed more evenly. You can also use the strained juice as a base for other homemade drinks.
Helpful Tips for the Best Homemade Cranberry Juice
Choose Fresh, Firm Cranberries
Good-quality fruit makes a difference in the final flavor and appearance of cranberry juice. Before adding the berries to your jars, rinse them thoroughly and remove any damaged fruit. Check the bottom of the cranberry bag as well, since small leaves, twigs, and dirt can sometimes collect there.
Adjust Sweetness Carefully
Cranberries are naturally tart, which is why sugar is included in this recipe. If you enjoy a sharper cranberry flavor, you may prefer less sweetness, while those who like a milder drink may prefer a sweeter result. However, do not change the sweetener amount in a shelf-stable canning recipe unless the substitution and proportions are supported by tested preservation guidance.
Leave the Correct Headspace
The original instructions call for approximately half an inch of headspace. This space helps accommodate expansion during processing. Avoid filling jars completely to the rim because doing so can interfere with the sealing process.
Use Clean Canning Equipment
Always inspect your jars before filling them. Cracks, chips, and damaged rims can prevent proper sealing. Use suitable canning lids and follow the manufacturer’s preparation instructions. A clean working area and properly maintained equipment make the process more organized.
Be Patient During Flavor Development
The cranberry juice may taste different immediately after preparation compared with several weeks later. Allowing the flavors to develop can produce a more balanced drink. The original recipe suggests a resting period of four to six weeks for the best flavor experience.
Can You Use Frozen Cranberries for Canning?
Yes, frozen cranberries can be used as an ingredient according to the original recipe. This is useful when fresh cranberries are difficult to find or when you want to prepare homemade cranberry juice outside the usual cranberry season.
The source recipe states that no measurement adjustment is necessary when replacing fresh cranberries with frozen ones. Measure the same six cups of cranberries and follow an appropriate tested canning method. Do not assume that the original processing instructions are automatically suitable for every variation in fruit preparation.
Delicious Ways to Enjoy Homemade Cranberry Juice
Homemade cranberry juice is versatile and can be enjoyed in several ways. Its naturally tart flavor makes it suitable for both simple everyday drinks and festive beverages. For a refreshing option, pour chilled cranberry juice into a glass filled with ice. You can also serve it in a pitcher when entertaining family and friends.
During colder months, cranberry juice can be served warm as a comforting seasonal drink. Its rich color makes it especially attractive for holiday meals, winter gatherings, and festive celebrations. You can also combine it with other beverages when preparing homemade drink variations, provided the ingredients are added when serving rather than changing the tested canning recipe.
Another enjoyable option is to use strained cranberry juice as a base for mocktails. Its sharp, fruity flavor pairs well with other fruit beverages and sparkling water. Whether you prefer it straight from the glass or as part of a creative drink, homemade cranberry juice is a useful addition to your kitchen.
Frequently Asked Questions About Canning Cranberry Juice
Can I Make Cranberry Juice With Frozen Fruit?
Yes. Frozen cranberries can be used instead of fresh cranberries according to the original recipe. The source states that the quantity does not need to be adjusted. Make sure the fruit is suitable for use and follow a tested canning process for the finished product.
How Much Sugar Should I Add to Cranberry Juice?
The recipe uses two cups of sugar for six cups of cranberries. The source recommends at least ¼ cup of sugar per quart because it helps extract juice from the berries. The amount can affect sweetness, so follow tested preservation instructions before reducing or replacing the sugar.
Why Does Sugar Settle at the Bottom of the Jar?
Sugar can settle toward the bottom while the jars are cooling and the cranberry juice is developing. The source recommends shaking the cooled jars to distribute the syrup and cranberry liquid. Only handle and store the jars according to safe canning recommendations.
Healthy Canning Cranberry Juice
 Recipe by admin
A homemade cranberry juice recipe made with whole cranberries, sugar, and water. This traditional jar-based preparation creates a naturally tart, flavorful beverage that can be served chilled or used in homemade drinks.
4
servings5
minutes20
minutes454
kcal25
minutesIngredients
6 cups (600 g) fresh cranberries
2 cups (400 g) sugar or sweetener of choice
Water, as needed to fill the jars
Directions
- Wash the cranberries thoroughly under running water. Remove leaves, dirt, small sticks, and bruised or soft berries.
- Divide the cranberries among clean quart canning jars.
- Add the sugar to the jars, distributing it evenly according to your preferred sweetness and the tested canning formulation.
- Pour water into each jar, leaving approximately ½ inch of headspace.
- Wipe the jar rims carefully and place clean canning lids on top.
- Secure the screw bands until fingertip-tight.
- Place the jars in a water bath canner and follow a tested processing procedure appropriate for the jar size and altitude. The original source specifies 20 minutes, but this time requires verification before use for quart jars.
- Remove the processed jars carefully and place them on a heat-safe surface.
- Allow the jars to cool completely without disturbing them.
- Check that the lids have sealed properly. Label and store only jars processed safely.
- For best flavor, allow the juice to develop for approximately 4–6 weeks.
- When ready to serve, strain the contents through a fine mesh strainer to remove the cooked cranberries.
Notes
- Frozen cranberries can replace fresh cranberries without changing the stated measurement.
- Wash and inspect cranberries carefully before using them.
- The original recipe recommends at least ¼ cup of sugar per quart to help extract cranberry juice.
- Honey is mentioned as an alternative, but use only a tested preservation formulation for substitutions.
- Allowing the jars to rest for 4–6 weeks is recommended for better flavor.
- Always verify safe canning times and methods using an authoritative tested recipe before storing jars at room temperature.
Nutrition Facts
- Total number of serves: 4
- Calories: 454kcal
- Fat: 1g
- Carbohydrates: 118g
- Net Carbs: 113g
- Fiber: 5g
- Sugar: 106g
- Protein: 1g