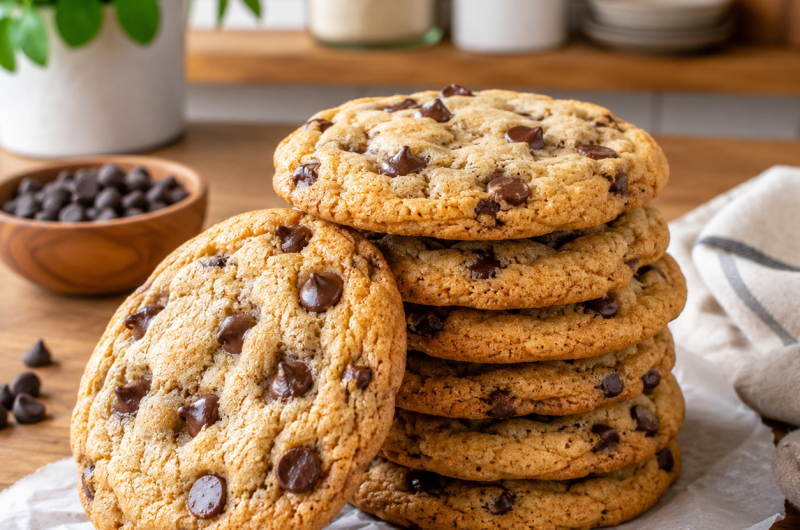
Gluten-Free Chocolate Chip Cookies are a delicious homemade dessert with golden, slightly crispy edges, soft and chewy centres, and plenty of melted chocolate in every bite. They deliver the familiar buttery flavour of traditional chocolate chip cookies without using regular wheat flour. Whether you’re following a gluten-free diet, baking for family members, or simply looking for an easy homemade treat, these cookies are a wonderful choice for any occasion.
Making gluten-free cookies at home doesn’t have to be difficult. With a good gluten-free all-purpose flour blend, softened butter, brown sugar, vanilla, and chocolate chips, you can prepare cookies that look and taste like classic bakery-style treats. The secret is choosing suitable ingredients, measuring them accurately, and baking the dough just long enough to develop golden edges while keeping the centres tender.
Why You’ll Love These Gluten-Free Chocolate Chip Cookies
These homemade gluten-free chocolate chip cookies are designed to offer the traditional flavour and texture people expect from a classic cookie recipe. The combination of butter, brown sugar, granulated sugar, and vanilla creates a rich, sweet dough that complements the chocolate chips. Each cookie has a satisfying contrast between its lightly crisp exterior and soft middle, making it enjoyable whether served warm or completely cooled.
Another reason to love this recipe is its straightforward preparation. You don’t need complicated baking equipment or specialist techniques to make a delicious batch. Basic mixing bowls, measuring tools, a baking tray, and an oven are enough. The familiar ingredients and simple method make this recipe suitable for beginners as well as experienced home bakers who want a dependable gluten-free dessert.
These cookies are also convenient for sharing. You can serve them at birthdays, family gatherings, holiday celebrations, school events, or afternoon tea. Their classic appearance makes them suitable for guests who don’t usually eat gluten-free desserts, so everyone can enjoy the same homemade treat.
What Makes Gluten-Free Cookies Soft and Chewy?
The Importance of the Flour Blend
Gluten-free flour behaves differently from traditional wheat flour because it doesn’t contain gluten, the protein that gives many baked goods their elasticity and structure. Choosing an appropriate flour blend is therefore important when making cookies. A gluten-free all-purpose baking blend designed for one-to-one substitution is a practical option because it combines alternative flours and starches to support the texture of familiar baked goods.
For these cookies, use a blend intended for baking rather than substituting a single alternative flour without adjusting the recipe. Different gluten-free flours absorb moisture differently, which can affect spreading, softness, and the finished texture. A suitable baking blend helps the dough hold together and produces cookies with a more consistent shape.
Brown Sugar and Granulated Sugar
Using two types of sugar helps create the balance of textures that makes chocolate chip cookies so appealing. Granulated sugar encourages browning and helps the edges become lightly crisp during baking. Light brown sugar contains molasses, which contributes moisture, a gentle caramel flavour, and the chewy texture associated with classic homemade cookies.
Combining these sugars gives the cookies a more rounded sweetness than using just one variety. The brown sugar complements the richness of the butter, while the granulated sugar helps the cookies develop their familiar golden appearance. Measuring both accurately is important because changing their proportions can affect the way the dough spreads and bakes.
Ingredients That Make These Cookies Delicious
Butter for Richness and Flavour
Butter gives chocolate chip cookies their characteristic rich taste and tender texture. Softened salted butter is especially convenient because it contributes both fat and a balanced savoury flavour. When creamed with sugar, it also helps incorporate air into the mixture, supporting a lighter cookie texture.
Allow the butter to soften before mixing so it combines smoothly with the sugars. It should be soft enough to press gently but should not be melted or greasy. Melted butter can change how the dough spreads, while butter that is too cold may not cream properly. Starting with softened butter helps create a smooth, consistent dough.
Vanilla Extract for a Warm Aroma
Vanilla extract enhances the flavour of the butter, sugar, and chocolate without overpowering them. Although it is used in a relatively small quantity, it contributes the familiar warm aroma associated with freshly baked cookies. Pure vanilla extract is a popular choice for its rich flavour, making it a useful ingredient in simple homemade desserts.
Adding vanilla with the egg allows it to blend evenly into the wet ingredients. This helps distribute its flavour throughout the dough, so the finished cookies taste balanced rather than having concentrated patches of vanilla.
Eggs for Structure and Moisture
Eggs help bind the ingredients together and provide moisture to the cookie dough. During baking, they also contribute to the structure that allows the cookies to hold their shape. Using a large egg at room temperature can make mixing easier because it blends more readily with softened butter and sugar.
Beat the egg into the creamed mixture until it is incorporated before adding the dry ingredients. This helps create a more even dough and reduces the chance of unevenly mixed ingredients affecting the finished cookies.
Chocolate Chips for Classic Cookie Flavour
Chocolate chips are the highlight of these gluten-free cookies. They soften in the oven and create rich chocolate pockets that contrast with the buttery sweetness of the dough. Semi-sweet chocolate chips are a traditional choice because their flavour balances the sugars, while dark chocolate chips provide a more intense chocolate taste.
Fold the chocolate chips into the dough at the end of mixing. Distributing them evenly helps ensure that every cookie contains chocolate rather than leaving some portions with very little. You can also reserve a few chips to press onto the tops of the dough balls before baking for an attractive bakery-style appearance.
How to Prepare Gluten-Free Chocolate Chip Cookie Dough
Mix the Dry Ingredients
Begin by combining the gluten-free all-purpose flour, baking soda, baking powder, and fine sea salt in a separate bowl. Stir them together so the leavening agents and salt are evenly distributed throughout the flour. This simple step helps the cookies bake more consistently and reduces the chance of one area of the dough containing too much baking powder or salt.
Preparing the dry ingredients separately also makes it easier to incorporate them gradually into the butter mixture. Keep the bowl nearby so you can add the flour mixture without interrupting the mixing process.
Cream the Butter and Sugars
In another bowl, beat the softened butter with the granulated sugar and light brown sugar until the mixture becomes pale and fluffy. This step is important because it incorporates small air pockets into the butter, helping the cookies develop a pleasant texture as they bake.
Avoid rushing the creaming process, but don’t continue mixing excessively once the mixture is light and combined. Properly softened butter makes this stage easier and helps the sugar blend more evenly. Scrape down the sides of the bowl when necessary so the ingredients mix thoroughly.
Add the Egg and Vanilla
Beat the egg and vanilla extract into the creamed butter and sugar. Mix until the wet ingredients are evenly combined and the mixture looks smooth. If some ingredients collect along the sides or bottom of the bowl, scrape them back into the centre before continuing.
Adding the egg before the flour helps distribute moisture throughout the dough. Once the wet mixture is ready, gradually add the dry ingredients and mix until a dough forms. Avoid unnecessary mixing after the flour has been incorporated, as overmixing can make it harder to achieve the intended tender texture.
Fold in the Chocolate Chips
Add the chocolate chips and gently fold them into the dough using a spatula or wooden spoon. Continue until the chocolate is distributed throughout the mixture. The dough should be thick enough to scoop and shape into individual portions.
Try to avoid crushing the chocolate chips or working the dough more than necessary. Once everything is evenly combined, the cookie dough is ready to portion and prepare for baking.
Shaping and Baking the Cookies
Portion the Dough Evenly
Use a small cookie scoop or tablespoon to divide the dough into portions of approximately one and a half tablespoons. Roll each portion gently between your hands to create a smooth ball. Keeping the portions similar in size helps the cookies bake at a consistent rate and gives the finished batch a neat appearance.
Arrange the dough balls on baking trays lined with parchment paper. Leave at least two inches between portions because the cookies will spread as they bake. Giving them enough room helps prevent neighbouring cookies from merging and allows the edges to brown evenly.
Bake Until the Edges Are Set
Preheat the oven to 375°F (190°C) before baking. A fully preheated oven helps the cookies begin setting at the correct temperature and encourages more predictable spreading. Place the prepared tray in the oven and bake the cookies for approximately nine to ten minutes, or until they appear just set.
The centres may still look slightly soft when you remove the tray. This is expected because the cookies continue to firm up as they rest on the hot baking sheet. Avoid waiting until the centres look completely firm inside the oven, as that can result in dry cookies after cooling.
Cool Before Serving
Allow the baked cookies to rest on the tray for five to ten minutes. This gives them time to become firm enough to handle without breaking while their residual heat gently finishes the baking process. Moving them too soon can cause soft cookies to bend or crumble.
Once they have set, transfer them carefully to a wire cooling rack. Air circulation around the cookies helps prevent moisture from collecting underneath. You can enjoy them while slightly warm for soft chocolate pockets or wait until they have cooled completely for a firmer texture.
Tips for Perfect Gluten-Free Chocolate Chip Cookies
One of the most useful tips is to measure the flour carefully. Adding too much flour can make gluten-free cookies dry or heavy, while using too little can cause excessive spreading. Spoon the flour gently into the measuring cup and level the top rather than pressing the flour down. If you have a kitchen scale, weighing ingredients according to the recipe’s measurements can provide additional consistency.
Choose a gluten-free flour blend specifically formulated for baking. Not all blends behave the same way, so changing brands may produce differences in moisture absorption and spreading. If you are baking for someone who must avoid gluten, check the flour and chocolate packaging and prevent cross-contact with ordinary wheat flour and contaminated equipment.
Pay attention to the butter’s temperature. Softened butter is important for proper creaming, but melted butter can cause the dough to behave differently. Likewise, avoid overbaking the cookies. Removing them when the edges are set and the centres remain slightly soft helps preserve their chewy texture.
Finally, give the cookies enough room on the baking tray. Crowding can cause them to touch as they spread and may make the batch bake unevenly. If you have multiple trays, bake them according to your oven’s capacity and allow the trays to cool before adding another batch of dough.
How to Store Gluten-Free Chocolate Chip Cookies
Storing at Room Temperature
Allow the cookies to cool completely before storing them in an airtight container. Keeping air exposure to a minimum helps prevent them from becoming stale and preserves their soft texture. Stored properly at room temperature, they generally remain enjoyable for approximately three to five days.
If you are stacking the cookies, place baking paper between the layers to reduce sticking. Make sure the container is sealed securely, especially if your kitchen is warm or humid. Avoid packing the cookies while they are still hot because trapped steam can affect their texture.
Freezing Baked Cookies
Baked cookies can be frozen for convenient desserts whenever you need them. Once they have cooled completely, place them in a freezer-safe airtight container or bag. Separate layers with parchment paper to make it easier to remove individual cookies without damaging them.
For the best quality, use them within approximately two months. Thaw the cookies at room temperature or warm them gently in a low-temperature oven if you prefer a softer texture. Freezing is a practical option when preparing treats ahead of a gathering or saving extra cookies for another day.
Freezing Unbaked Cookie Dough
You can also freeze individual portions of unbaked dough. Shape the dough into balls and arrange them in a single layer in a freezer-safe container or bag. Once frozen, the portions can be stored together, making it convenient to bake only the number of cookies you need.
When you’re ready to bake, thaw the dough overnight in the refrigerator or allow it to soften at room temperature for approximately two hours. Baking from thawed dough makes it easy to enjoy freshly baked cookies without preparing a new batch each time.
Serving Ideas for Every Occasion
These gluten-free chocolate chip cookies are delicious on their own, but they can also be served in several simple ways. Pair them with a glass of milk, a cup of coffee, or hot tea for an easy afternoon snack. Slightly warm cookies are especially enjoyable because the chocolate remains soft and the centres have a tender texture.
For a dessert platter, arrange the cookies with fresh fruit or other gluten-free treats. They can also be packed into lunchboxes, served after dinner, or prepared for holiday gatherings. If you’re making them as a gift, place completely cooled cookies in a decorative tin or food-safe gift box.
Frequently Asked Questions
Why Are My Gluten-Free Chocolate Chip Cookies Crumbly?
Crumbly cookies may result from using too much flour, choosing a flour blend that absorbs more moisture, or overbaking. Measure the flour carefully and use a gluten-free blend intended for baking. Removing the cookies while the centres are still slightly soft also helps prevent them from becoming too dry.
Can I Use Different Chocolate Chips?
Yes. Semi-sweet chocolate chips are a classic option, but dark chocolate chips can create a richer flavour. Choose a variety that suits your taste and check its label if you need the finished cookies to be gluten-free.
Do I Need to Refrigerate the Dough?
The provided method does not require a chilling step. You can portion the dough and bake it as directed. If you choose to prepare the dough ahead, keep it covered and refrigerated until you’re ready to use it, allowing it to soften enough to portion if necessary.
How Do I Know When the Cookies Are Done?
Look for edges that appear lightly golden and set while the centres remain a little soft. The cookies will continue to firm up during their resting time on the baking tray. Baking them until the centres are completely firm can produce a drier result.
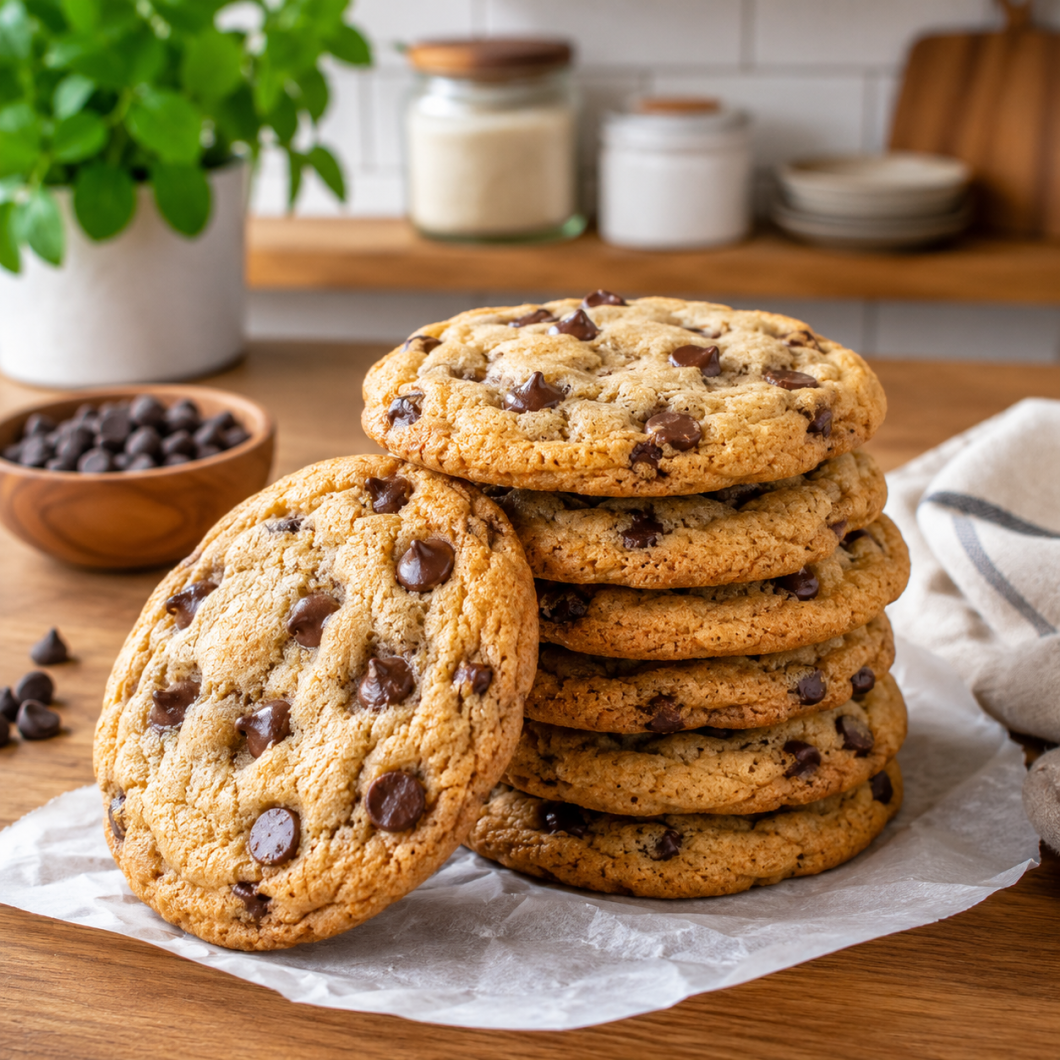
Gluten Free Chocolate Chip Cookies
These Gluten-Free Chocolate Chip Cookies are buttery, crisp around the edges, and perfectly chewy in the centre.
20
servings10
minutes10
minutes200
kcal10
minutes30
minutesIngredients
½ cup salted butter, softened
½ cup granulated sugar
½ cup light brown sugar
1 teaspoon pure vanilla extract
1 large egg
1½ cups gluten-free all-purpose flour
½ teaspoon baking soda
¼ teaspoon baking powder
½ teaspoon fine sea salt
1 cup chocolate chips
Directions
- Prepare the Oven
Preheat the oven to 375°F (190°C).
Line two baking trays with parchment paper. - Mix the Dry Ingredients
In a small bowl, combine: Gluten-free all-purpose flour
Baking soda
Baking powder
Fine sea salt - Cream the Butter and Sugars
Place the softened butter into a mixing bowl.
Add the granulated sugar and light brown sugar.
Beat until the mixture becomes light, creamy, and fluffy. - Add the Wet Ingredients
Mix in the egg.
Add the vanilla extract.
Beat until fully incorporated. - Combine Everything
Gradually add the dry ingredient mixture to the wet ingredients.
Mix until a smooth cookie dough forms.
Fold the chocolate chips evenly throughout the dough. - Shape the Cookies
Scoop approximately 1½ tablespoons of dough for each cookie.
Roll into smooth balls.
Arrange them on the prepared baking trays, leaving about 2 inches of space between each cookie. - Bake
Bake for 9–10 minutes, or until the cookies are just set.
Avoid overbaking to maintain a soft, chewy centre. - Cool
Leave the cookies on the baking tray for 5–10 minutes.
Transfer them to a wire rack to cool completely.
Nutrition Facts
- Calories: 200kcal
- Fat: 9g
- Carbohydrates: 29g
- Protein: 2g