Finding a good gluten free bread recipe that tastes, looks, and feels like traditional homemade white bread can be challenging. Many gluten free loaves turn out dry, crumbly, dense, or difficult to slice. This homemade gluten free milk bread is different.
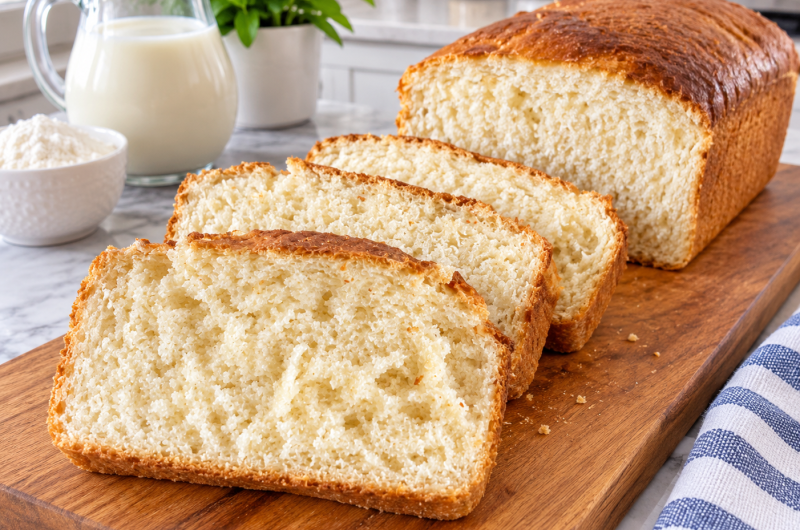
It has a soft, tender interior, a beautiful golden-brown crust, and a light texture that makes it suitable for everyday meals. Whether you need gluten free sandwich bread for breakfast, lunch, or dinner, this recipe gives you a delicious homemade option without complicated baking techniques.
This easy gluten free milk bread is prepared with a combination of gluten free all-purpose flour, yeast, warm milk, butter, and egg whites. These simple ingredients work together to create a loaf that is soft, flexible, and easy to cut into slices.
The dough requires only a few minutes of active preparation, making it a practical choice for home bakers who want fresh gluten free bread without spending the entire day in the kitchen.
One of the best features of this recipe is its straightforward preparation method. Unlike traditional wheat bread, gluten free bread dough does not need to be kneaded until elastic. Instead, the mixture resembles a thick, sticky batter that becomes smooth and fluffy after mixing. Once transferred to a loaf pan, the dough rises before baking into a beautiful loaf with a satisfying crust and a soft center.
What Makes This Gluten Free Milk Bread Special?
Homemade gluten free milk bread stands out because of its soft texture and mild, slightly buttery flavor. Milk helps create a tender crumb, while melted butter adds richness and keeps the bread from tasting dry. The yeast provides the rise needed to produce a lighter loaf, and the egg whites contribute structure to the finished bread. Together, these ingredients create a delicious alternative to many packaged gluten free bread products.
Another reason to love this recipe is that it produces bread that is easy to slice. Some gluten free loaves break apart when cut or become crumbly after cooling. This recipe uses xanthan gum to help provide structure and improve the texture. When the loaf is baked properly and allowed to cool completely, the slices hold together well and can be used for sandwiches, toast, and other everyday meals.
The golden crust gives the bread a traditional bakery-style appearance. If you enjoy a slightly nutty topping, toasted sesame seeds can be sprinkled over the loaf before baking. The seeds are optional, so you can leave them off if you prefer a simple white gluten free bread with a classic appearance.
Why Use Milk in Gluten Free Bread?
Milk is an important ingredient in this homemade gluten free bread recipe because it contributes moisture, tenderness, and flavor. Gluten free flour blends can sometimes produce a dry texture, especially when baked into yeast bread. Warm milk helps hydrate the flour properly and supports the development of a softer crumb. It also gives the bread a gentle richness that makes every slice enjoyable.
The milk should be warmed to approximately 95°F before being added to the other ingredients. It should feel comfortably warm rather than hot. Excessively hot milk can damage the yeast and prevent the dough from rising properly. Using milk at the recommended temperature helps create a suitable environment for yeast activity while allowing the ingredients to combine smoothly.
If you prefer a dairy-free version, unsweetened, unflavored nondairy milk can be used as described in the recipe notes. Choose a variety with a consistency similar to regular milk rather than a very thin, fat-free alternative. This helps maintain the moisture level needed for a soft and tender gluten free loaf.
How to Make Gluten Free Milk Bread in Four Easy Steps
This easy gluten free bread recipe follows four main stages: preparing the ingredients, mixing the dough, allowing it to rise and baking, and cooling before slicing. A stand mixer fitted with a paddle attachment is strongly recommended because gluten free bread dough is thick and sticky. The mixer helps incorporate the ingredients evenly and creates the smooth consistency needed for a successful loaf.
Step 1: Combine the Dry and Wet Ingredients
Start by preparing a 9-inch x 5-inch loaf pan or a 1-pound Pullman-style loaf pan. Grease the pan or line the bottom and sides with parchment paper to prevent the bread from sticking. Set the prepared pan aside while you mix the dough.
Place the gluten free flour blend, xanthan gum, instant yeast, cream of tartar, and granulated sugar into the bowl of a stand mixer fitted with the paddle attachment. Use a separate handheld whisk to combine the dry ingredients thoroughly. Add the kosher salt afterward and whisk again to distribute it evenly.
Next, pour in the warm milk, melted and cooled butter, apple cider vinegar, and room-temperature egg whites. Mix on low speed until the ingredients begin to come together. Scrape down the sides of the bowl when necessary so that no dry flour remains stuck around the edges.
At this stage, the mixture will look thicker and stickier than ordinary bread dough. This is completely normal for gluten free yeast bread. You should not expect a firm ball that can be kneaded by hand. The correct consistency is a thick, smooth mixture that can be scraped from the bowl using a spatula.
Step 2: Beat the Dough Until Smooth and Fluffy
Once the ingredients have been incorporated, increase the mixer speed to medium-high. Continue beating for approximately three minutes. This step is important because it helps distribute moisture throughout the flour blend and produces a smoother, more uniform dough.
During mixing, the dough may gather toward the center of the bowl before sticking to the sides again. Stop the mixer when needed and scrape the bowl to make sure everything is evenly incorporated. The finished mixture should look slightly whipped, smooth, thick, and sticky rather than dry or crumbly.
If you live in a particularly dry climate and the mixture appears noticeably drier than expected, add warm water gradually, using one tablespoon at a time. The recipe notes allow approximately one to two tablespoons when necessary. Avoid adding too much liquid because excessive moisture can make the finished gluten free bread gummy or difficult to slice.
A stand mixer with a paddle attachment is the preferred equipment for this stage. It produces consistent results with less effort than hand mixing. If you do not have a stand mixer, a food processor fitted with a plastic blade may also be used, although the final texture can vary.
Step 3: Transfer the Dough, Allow It to Rise, and Bake
After mixing, scrape the dough into the prepared loaf pan. Use a wet spatula to smooth the surface and create an even top. Since gluten free bread dough is sticky, a damp spatula makes this process much easier and prevents the mixture from clinging excessively to the utensil.
Cover the pan with lightly oiled plastic wrap. If you are using a Pullman-style loaf pan, follow the appropriate covering method for its lid. Place the pan in a warm, draft-free area and allow the dough to rise for approximately 30 to 45 minutes, or until it reaches about 150% of its original size. This means the dough should become approximately 50% larger rather than doubling.
Rising time can change depending on the temperature and humidity of your kitchen. In cooler weather, the dough may need additional time to reach the desired size. In warmer conditions, it may rise more quickly. Watch the dough instead of relying entirely on the clock.
One important detail is to avoid overproofing. When the surface begins to break in places and small craters appear, the dough may have risen too much. This can affect the loaf’s structure and cause it to collapse during baking. The best time to bake is when the dough has increased in size but still has a smooth, supported surface.
As the dough approaches the end of its rising period, preheat your oven to 375°F. Remove the plastic wrap and Pullman lid, if applicable. If desired, use a sharp knife or bread lame to make a shallow slash approximately 1/4-inch deep across the top. For a sesame seed topping, gently brush the surface with melted butter and sprinkle the toasted sesame seeds evenly over it.
If you are using a Pullman pan, grease the inside of its lid before placing it on top. Transfer the pan to the middle or appropriate upper oven rack and bake for approximately 45 minutes to one hour. When using a Pullman pan, remove the lid after about 40 minutes and return the bread to the oven to finish baking.
The bread should develop a firm, golden-brown crust during baking. Its internal temperature should reach approximately 205°F when checked with an instant-read thermometer. A toothpick inserted into the center should come out mostly clean rather than wet. You can also gently tap the loaf to check for a somewhat hollow sound.
If the bread has reached the correct internal temperature but the outside still feels too soft, return it to the oven. Reduce the temperature to 300°F and continue baking for up to another 20 minutes. This additional baking time helps firm up the crust and ensures that the loaf is fully baked.
Step 4: Cool Completely Before Slicing
Once the bread is baked, remove it from the oven and allow it to rest in the loaf pan for approximately 10 minutes if it has not already been removed. Transfer it carefully to a wire cooling rack and remove any parchment paper. Let the loaf cool completely before cutting it into slices.
Cooling is especially important when preparing gluten free bread because the starches inside the loaf need time to settle and firm up. Cutting the bread while it is still warm can cause the center to become compressed, sticky, or gummy. Even if the outside looks ready, the interior may still need additional time to develop its final texture.
For the best results, allow the loaf to cool for at least one hour, preferably closer to two hours. Once completely cool, use a serrated bread knife to cut it into 10 equal slices. A gentle sawing motion helps create neat slices without pressing down too hard on the soft crumb.
Patience during this final stage makes a considerable difference. Properly cooled gluten free milk bread is easier to handle, holds its shape better, and is more enjoyable for sandwiches and toast.
What Does Gluten Free Milk Bread Taste Like?
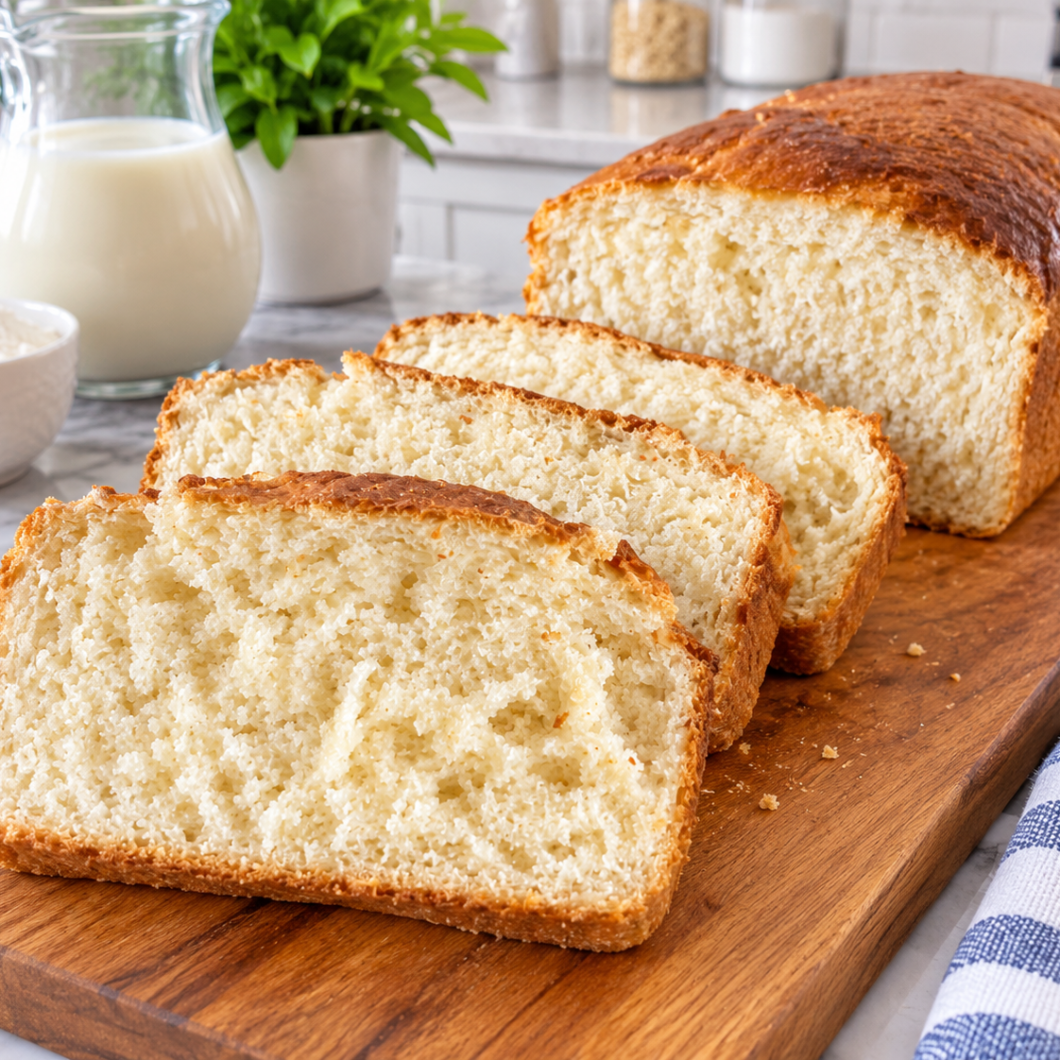
This homemade gluten free milk bread has a mild, buttery flavor with a soft and tender interior. It is not overly sweet, making it suitable for both savory and slightly sweet toppings. The crust develops a deeper golden-brown color during baking, while the center remains light enough for everyday sandwiches.
The texture is one of its most appealing qualities. Instead of breaking apart easily, the slices hold together when handled carefully. The milk and butter contribute richness, while the yeast helps create a lighter structure. When allowed to cool completely, the bread becomes easier to cut and offers a satisfying texture for a variety of meals.
If you enjoy traditional white bread but need a gluten free alternative, this loaf is a useful recipe to keep in your homemade baking collection.
Best Ways to Serve Homemade Gluten Free Bread
There are many ways to enjoy freshly baked gluten free milk bread. Its mild flavor makes it versatile enough for breakfast, lunch, and dinner. The soft slices work particularly well for simple sandwiches, toasted bread, and snacks.
For breakfast, serve a slice with butter, jam, honey, or your favorite spread. You can also toast the bread until lightly golden and add eggs, avocado, or cheese for a more filling meal. The buttery flavor complements both sweet and savory breakfast ingredients.
For lunch, use the bread to prepare chicken sandwiches, vegetable sandwiches, cheese toasties, or classic gluten free grilled cheese. Its soft texture makes it a pleasant choice for sandwiches that need a sturdy but tender base.
This bread can also be served alongside soups, salads, and warm meals. Lightly toasted slices are delicious with creamy soups, while plain slices can accompany roasted vegetables and other savory dishes. You can even cut the bread into smaller pieces to prepare homemade croutons, provided the slices are dried or toasted until crisp.
Frequently Asked Questions About Gluten Free Milk Bread
Can I make this gluten free bread without a stand mixer?
A stand mixer with a paddle attachment is strongly recommended because the dough is thick and sticky. However, you can try using a food processor with a plastic blade, pulsing until the mixture becomes smooth. Mixing by hand is also possible, but it may require more effort and the finished results can vary.
Can I use active dry yeast instead of instant yeast?
Yes, active dry yeast can be used as a substitute. Use 10 grams, approximately three teaspoons, instead of the instant yeast. Before combining it with the remaining ingredients, dissolve and proof it in some of the warm milk until it becomes foamy. This additional step helps activate the yeast before mixing.
Why is gluten free bread dough so sticky?
Gluten free bread dough has a different consistency from traditional wheat bread dough because it does not contain the gluten network that makes conventional bread dough elastic and easy to knead. This recipe produces a thick, sticky mixture that is handled with a spatula rather than by hand. The texture is normal and helps create a soft finished loaf.
Gluten free milk bread
 Recipe by admin
This easy gluten free milk bread has a soft, tender interior and a beautiful golden crust. Made with gluten free flour, yeast, warm milk, and butter, it is perfect for sandwiches, toast, and everyday meals.
10
servings15
minutes1
hour237
kcal60
2
hours15
minutesIngredients
3 cups (420 g) all purpose gluten free flour blend, (See Recipe Notes)
3 teaspoons xanthan gum, omit if your blend already contains it
2 ½ teaspoons (8 g) instant yeast, (See Recipe Notes)
¼ teaspoon cream of tartar
2 tablespoons (25 g) granulated sugar
2 teaspoons (12 g) kosher salt
1 ½ cups (12 fluid ounces) warm milk, (about 95°F) (See Recipe Notes)
4 tablespoons (56 g) unsalted butter, melted and cooled (plus more for brushing if using seeds) (See Recipe Notes)
1 teaspoon apple cider vinegar
2 (50 g) egg whites, at room temperature (See Recipe Notes)
Toasted sesame seeds for sprinkling, optional
Directions
- Prepare the loaf pan.
Grease or line a 9-inch x 5-inch loaf pan (ideally one with 4-inch sides), or a 1-pound Pullman-style loaf pan (with a lid). You can also line the bottom and sides with parchment paper. - Combine the dry ingredients.
In a stand mixer bowl fitted with the paddle attachment, add the flour blend, xanthan gum, instant yeast, cream of tartar, and sugar. Whisk together using a separate handheld whisk. Add the salt and whisk again. - Add the wet ingredients.
Add the warm milk, melted butter, vinegar, and egg whites. Mix on low speed, scraping down the sides of the bowl as necessary. - Beat the dough.
Increase the mixer speed to medium-high and mix for approximately 3 minutes. The dough should become thick, smooth, wet, and slightly whipped in appearance. - Transfer to the pan.
Scrape the mixture into the prepared loaf pan. Use a wet spatula to smooth the surface evenly. - Allow the dough to rise.
Cover with lightly oiled plastic wrap and let rise in a warm, draft-free place for 30–45 minutes, or until approximately 50% larger than its original size. - Prepare for baking.
Preheat the oven to 375°F. Remove the plastic wrap and Pullman lid, if using. Optionally slash the top about 1/4-inch deep. Brush with melted butter and sprinkle toasted sesame seeds over the surface if desired. - Bake the bread.
If using a Pullman pan, grease the inside of the lid and put it in place. Bake for 45 minutes to 1 hour. Remove the Pullman lid after approximately 40 minutes and continue baking. - Check for doneness.
The bread should reach an internal temperature of approximately 205°F. A toothpick inserted into the center should come out mostly clean. The crust should be firm and the loaf should sound somewhat hollow when tapped. - Finish baking if necessary.
If the bread still feels soft on the outside, return it to the oven at 300°F for up to another 20 minutes. - Cool and slice.
Let the bread rest in the pan for approximately 10 minutes. Transfer to a wire rack, remove parchment paper, and cool completely for 1–2 hours. Slice into 10 equal pieces using a serrated knife. - Store properly.
Wrap the cooled loaf tightly in plastic wrap and store at room temperature for up to two days. For longer storage, freeze the whole loaf or individually wrapped slices.
Notes
- Flour blends: Use a high-quality all-purpose gluten free flour intended for yeast bread, such as Better Batter’s original gluten free blend, Nicole’s Best multipurpose gluten free flour blend (with 3 tsp xanthan gum), King Arthur gluten free bread flour (try adding 2 tbsp more milk), or Caputo Fioreglut.
- Using active dry yeast: Substitute 10g (about 3 tsp) for instant yeast. Proof in some of the milk until foamy before adding.
- Dairy-free: Use a block-style vegan butter like Melt or Miyoko’s. Use any unsweetened, unflavored nondairy milk with similar consistency to cow’s milk (not fat-free).
- Egg-free: Use 50 grams aquafaba (the brine from a can of unsalted chickpeas) or Bob’s Red Mill egg replacer.
- Mixing tips: A stand mixer with paddle attachment is strongly recommended. You can try pulsing the dough in a 7-cup food processor with plastic blade until smooth. Mixing by hand is possible, but results may vary.
- Cooling: Allow the bread to cool completely before slicing to avoid a gummy center.
- Freezing: Freeze the cooled loaf tightly wrapped, or wrap individual slices separately and toast directly from frozen.
Nutrition Facts
- Total number of serves: 10
- Calories: 237kcal
- Fat: 6g
- Carbohydrates: 39g
- Net Carbs: 36g
- Fiber: 3g
- Sugar: 4g
- Protein: 5g