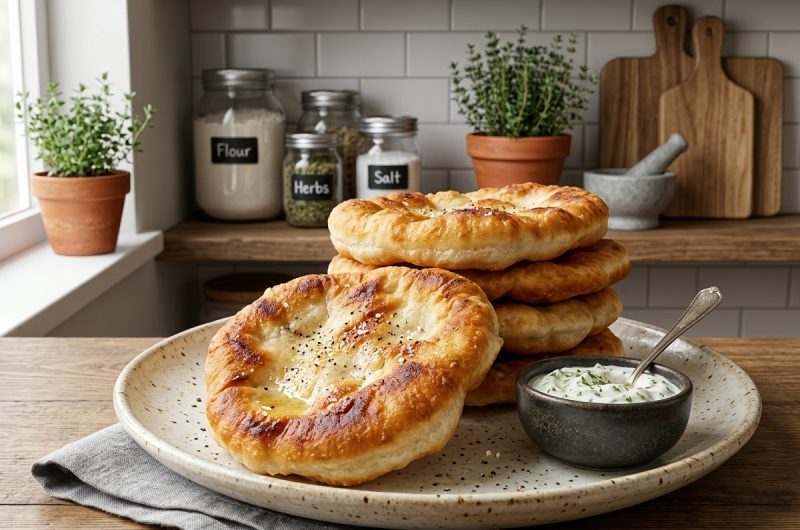
Bannock Bread is a simple homemade fried bread recipe that brings together everyday ingredients and a straightforward cooking method. Made with all-purpose flour, baking powder, salt, oil, and water, this quick skillet bread is a convenient choice when you want fresh bread without preparing yeast or waiting for dough to rise.
The outside becomes beautifully golden during frying, while the inside stays soft and satisfying. Bannock can be served for breakfast, lunch, dinner, or as a snack.
One of the most useful things about this easy bannock recipe is how quickly it comes together. You do not need a bread machine, stand mixer, or complicated baking equipment. A mixing bowl, fork, clean work surface, and frying pan are enough to prepare the dough and cook it. The recipe takes approximately 10 minutes to prepare and 15 minutes to cook, making it a practical option for busy days, family meals, and outdoor cooking.
What Is Bannock Bread?
Bannock is a type of bread with Scottish roots and a long history in Indigenous communities in North America. Scottish explorers and traders brought bannock traditions to the continent, and Indigenous peoples, including Metis communities, incorporated and adapted the bread into their food traditions. Over generations, different communities and households developed their own preparations, ingredients, and cooking methods.
Historically, bannock was made in different ways depending on the available ingredients and local traditions. Some earlier versions used barley or oats, along with fat and water. Other preparations included ingredients such as milk, buttermilk, or sugar. Modern recipes may use wheat flour and baking powder to make a quick dough that can be cooked in a skillet or baked in an oven. This particular recipe is a simple fried version.
This Easy Bannock Bread Recipe
No Yeast and No Rising Time
This bannock bread recipe uses baking powder instead of yeast, so there is no need to wait for the dough to rise. Traditional yeast bread requires time for fermentation and often needs several hours between mixing and baking. Bannock is different because you can prepare the dough and cook it shortly afterward. It is particularly helpful when you want fresh homemade bread without planning ahead.
Simple Pantry Ingredients
Another reason to make homemade bannock is that the ingredients are straightforward and easy to find. All-purpose flour, baking powder, salt, water, and oil are common kitchen staples. You do not need special bread flour, unusual ingredients, or expensive equipment. If you already have the ingredients in your kitchen, you can prepare the dough whenever you need a quick bread accompaniment.
Perfect for Different Meals
Bannock is a versatile bread that works with a wide range of foods. You can serve it with scrambled eggs in the morning, alongside soup at lunchtime, or with meat and vegetables for dinner. Its mild flavor also makes it suitable for sweet toppings such as honey, butter, and jam. Because the recipe makes five individual portions, it is convenient for serving a small family or sharing at the table.
Ingredients for Homemade Bannock Bread
All-Purpose Flour
All-purpose flour is the main ingredient in bannock and provides the structure needed to hold the dough together. It creates a familiar bread texture and makes the dough easy to shape into individual portions. Measuring the flour accurately is important because too much flour can make the bread dry and dense. For the best results, avoid packing the flour tightly into the measuring cup.
Baking Powder
Baking powder is responsible for the light rise in this no-yeast bread. It helps the dough expand during cooking and gives the inside a softer texture. Since the recipe does not use yeast, baking powder is particularly important. Whisk it thoroughly with the flour and salt so that it is distributed evenly throughout the dough.
Salt
Salt adds flavor and balances the taste of the flour. Even though the recipe requires only half a teaspoon, it helps prevent the bread from tasting bland. Combining the salt with the dry ingredients before adding the water also makes it easier to distribute the seasoning evenly.
Olive Oil or Vegetable Oil
A tablespoon of olive oil or vegetable oil is added directly to the dough. This small amount of oil contributes to the dough’s texture and helps bring the ingredients together. Olive oil has a mild flavor, while vegetable oil is more neutral. Either option works for this recipe, so you can choose whichever you prefer.
Water and Vegetable Oil for Frying
Water is gradually mixed into the dry ingredients to form a soft, slightly sticky dough. Adding it slowly makes it easier to control the consistency and avoid making the dough too wet. Vegetable oil is also needed for frying the flattened portions. Use enough to cover the bottom of the skillet and maintain a steady medium heat during cooking.
How to Make Bannock Bread Step by Step
Step 1: Whisk the Dry Ingredients
Start by placing the all-purpose flour, baking powder, and salt in a large mixing bowl. Whisk them together until the ingredients are evenly combined. This helps distribute the baking powder throughout the flour and supports a consistent texture in the finished bread. Make sure the bowl is large enough to give you plenty of room to stir the dough without spilling ingredients.
It is worth taking a moment to mix the dry ingredients properly before adding the oil and water. Unevenly distributed baking powder can lead to inconsistent results. A simple whisk is enough for this step, and you do not need an electric mixer or food processor.
Step 2: Add the Oil and Water
Pour the olive oil or vegetable oil into the flour mixture and stir it with a fork. Begin adding the water gradually, stirring as you go. Continue until the flour is mostly incorporated and the mixture starts holding together as a dough. Adding the water in stages gives you better control over the texture and helps prevent an overly wet mixture.
The dough should be soft and slightly sticky rather than firm and dry. Avoid adding unnecessary extra flour simply because the mixture feels tacky. A little stickiness is normal for this recipe. Once the dough has come together and there are no large areas of dry flour, it is ready to move to the work surface.
Step 3: Knead the Dough Gently
Lightly flour a clean work surface and transfer the dough onto it. Knead gently about ten times, using just enough pressure to bring everything together. Unlike traditional yeast dough, bannock does not require extended kneading. The purpose of this step is simply to create a cohesive dough that can be divided and shaped.
Do not worry if the dough does not feel completely smooth. It is more important to avoid overworking it than to create a perfectly polished dough ball. Excessive kneading can make the bread firmer than intended. Keep your movements gentle, and stop as soon as the ingredients hold together.
Step 4: Divide and Flatten the Dough
Divide the dough into five approximately equal portions. Shape each portion into a ball, then gently flatten it with the palm of your hand. Try to make each piece a similar thickness so that the bannock cooks evenly in the skillet. You do not need to create perfectly round pieces because a rustic shape is perfectly suitable for this traditional-style bread.
If one piece is noticeably thicker than the others, it may need more time in the pan. Keeping the portions reasonably uniform makes the cooking process easier and helps prevent some pieces from becoming overcooked while others are still raw in the center.
Step 5: Heat the Frying Oil
Place a medium frying pan or cast-iron skillet over medium heat. Add enough vegetable oil to cover the bottom of the pan and heat it to approximately 350°F (175°C). If you have a kitchen thermometer, it can help you maintain the correct temperature. Otherwise, watch the oil carefully and avoid allowing it to smoke.
The temperature is important because bannock needs enough heat to develop a golden exterior while cooking through the middle. Oil that is too hot can brown the outside before the center is ready. Oil that is too cool can make the bread take longer to brown and may result in a greasier texture.
Step 6: Fry Until Golden Brown
Carefully place the flattened dough portions into the hot oil. Leave enough room between the pieces to turn them without difficulty. Fry over medium heat until the first side becomes golden brown, then flip and cook the other side. Keep an eye on the color as the bread cooks and adjust the heat if it starts browning too quickly.
The exact frying time can vary depending on the thickness of the dough and the heat of your skillet. Check that the inside is cooked before removing the bread. If necessary, reduce the heat slightly and allow the pieces additional time to finish cooking. Work in batches if your pan is not large enough to hold all five portions comfortably.
Step 7: Drain and Serve
Once the bannock is golden brown on both sides and cooked through, transfer each piece to a plate lined with paper towels. Allow the excess oil to drain briefly before serving. Bannock is especially enjoyable when it is still warm, with a lightly crisp exterior and a soft center.
You can serve the bread immediately or allow it to cool to room temperature. Place the pieces in a serving basket or arrange them on a plate alongside your meal. Since bannock has a mild flavor, it pairs easily with a variety of toppings and dishes.
What to Serve with Bannock Bread
Bannock for Breakfast
Bannock makes a convenient breakfast bread because it can be prepared without waiting for dough to rise. Serve it with scrambled eggs, cheese, omelets, or sautéed vegetables for a savory morning meal. If you prefer a sweeter breakfast, add butter, honey, or jam. The bread’s simple flavor makes it easy to combine with familiar ingredients without needing to change the original recipe.
Bannock as a Side Dish
For lunch and dinner, serve bannock alongside soup, stew, beans, roasted vegetables, or grilled meat. Its soft center makes it useful for enjoying flavorful sauces and broths. You can use it as an alternative to ordinary dinner rolls or sliced bread. Individual portions also make it easy to serve alongside a shared family meal.
Bannock for Camping
Bannock is a practical option for camping because its ingredients are simple and its cooking method does not require an oven. You can measure the dry ingredients at home and bring them in a sealed container. When you are ready to cook, add the oil and water, shape the dough, and fry it in a suitable skillet over a controlled heat source.
Tips for Making the Best Bannock Bread
Do Not Overknead
The dough only needs gentle kneading to come together. Working it too much can create a firmer texture, so stop after approximately ten kneads. A slightly sticky dough is normal, and adding too much extra flour can make the bread heavier and drier.
Keep the Heat at Medium
Medium heat helps the bannock cook evenly and develop a golden crust without burning. If the bread darkens too quickly, lower the heat. Cooking more slowly is preferable to removing bread that is browned outside but still undercooked inside.
Make the Portions Similar in Size
Divide the dough into five portions of approximately equal size. Flatten them to a similar thickness so that they cook at a similar rate. This makes it easier to manage the skillet and helps ensure that every piece has a consistent texture.
Can You Make Bannock with Whole Wheat Flour?
Yes, whole wheat flour can be used to make bannock, but it creates a heartier and generally denser bread. For a softer result, replace only part of the all-purpose flour with whole wheat flour rather than using it for the entire recipe. The suggested variation uses approximately one-half to three-quarters of a cup of whole wheat flour, with the remaining amount kept as all-purpose flour.
Whole wheat flour gives the bread a more noticeable grain flavor and a different texture. The dough may feel somewhat different to handle, so continue adding the water gradually and avoid overkneading. This variation is useful if you enjoy the taste of whole grains while still wanting a relatively soft fried bread.
Can You Bake Bannock Instead of Frying?
Bannock can be baked if you prefer an oven-based cooking method. Place the prepared dough on a lightly oiled baking sheet and bake in a preheated oven at 350°F (180°C) for approximately 25 to 30 minutes. Check the bread toward the end of the baking time to make sure it has cooked through.
The texture of baked bannock is different from skillet-fried bannock. Baking generally produces a heavier and denser result, while frying creates a golden exterior and a lighter, softer interior. Both methods can be used, depending on your preference and the equipment available.
How to Store and Reheat Bannock Bread
Bannock is best enjoyed soon after it is made because the freshly fried texture is one of its most appealing qualities. As the bread sits, the exterior gradually loses its crispness, and the overall texture changes. For this reason, it is not particularly recommended as a bread for extended storage.
If you have leftovers, allow them to cool before placing them in a covered food container and refrigerating them promptly. When you are ready to eat them, reheat gently in a skillet until warmed through. Reheated bannock will not be exactly like freshly fried bread, but gentle warming can make leftovers more enjoyable.
Frequently Asked Questions
Does Bannock Bread Contain Yeast?
No, this easy bannock bread recipe uses baking powder instead of yeast. There is no fermentation process or rising period, making it a quick alternative to traditional yeast bread. You can prepare the dough, shape it, and begin cooking shortly after mixing.
Why Is My Bannock Brown Outside but Raw Inside?
This can happen when the oil is too hot or the dough portions are too thick. Use medium heat and flatten the dough evenly before frying. If the outside browns too quickly, reduce the heat and allow more time for the center to cook through.
Can Bannock Be Made Ahead of Time?
You can measure the dry ingredients in advance to make the cooking process quicker. However, for the freshest texture, prepare and fry the dough shortly before serving. Bannock is most enjoyable when it is freshly cooked rather than stored for a long period.
Bannock Bread (Side-Dish)
 Recipe by admin
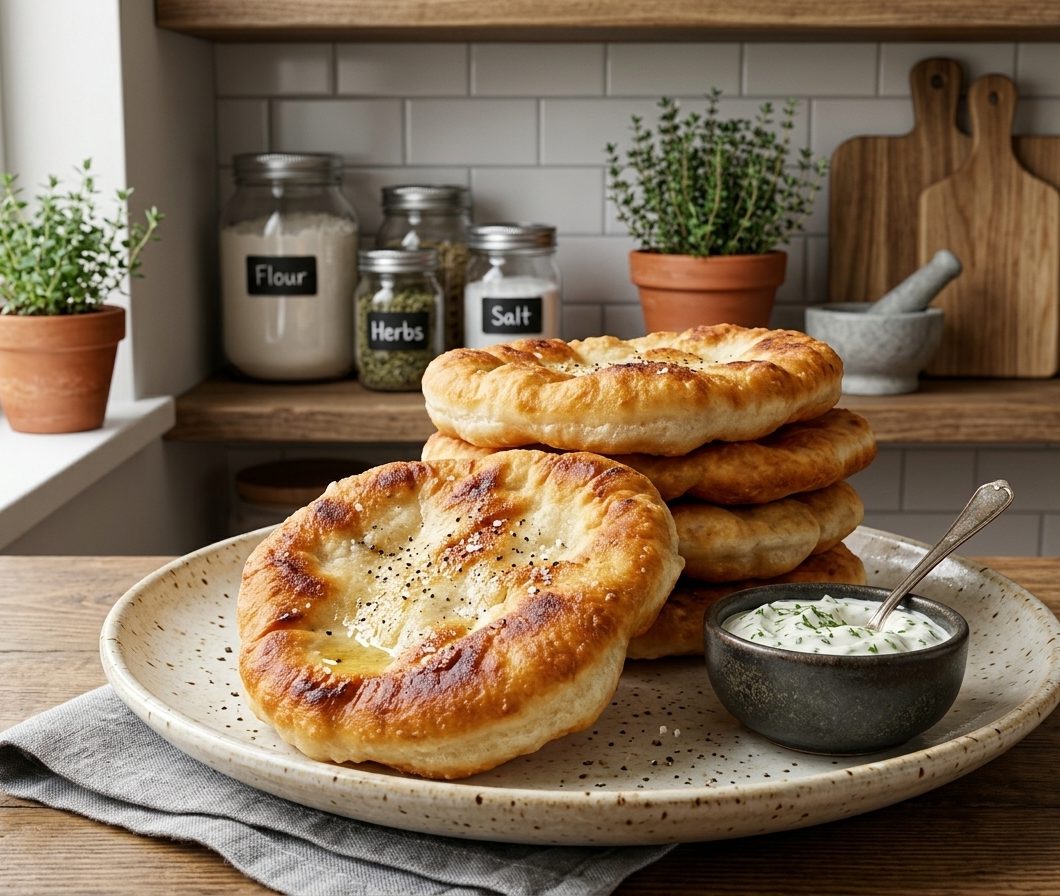
Bannock Bread is a simple no-yeast fried bread made with flour, baking powder, salt, oil, and water.
5
servings10
minutes15
minutes208
kcal25
minutesIngredients
2 cups all-purpose flour
2 teaspoons baking powder
½ teaspoon salt
1 tablespoon olive oil or vegetable oil
¾ cup water
Vegetable oil for frying
Directions
- In a large bowl, whisk together the flour, baking powder, and salt until evenly combined.
- Add the olive oil and mix with a fork. Gradually pour in the water, stirring until the dough almost holds together.
- Transfer the dough to a lightly floured surface. Gently knead about 10 times, just until it comes together. The dough will be sticky, so avoid overkneading.
- Divide the dough into 5 balls. Flatten each one with the palm of your hand to make individual portions.
- Heat enough vegetable oil to cover the bottom of a medium frying pan. Fry over medium heat, aiming for approximately 350°F (175°C).
- Cook until golden brown on one side, then turn and fry the other side until golden and cooked through.
- Transfer to a paper towel-lined plate to drain. Serve warm or at room temperature.
Notes
- Do not use excessively high heat, or the outside may brown before the center cooks.
- You can replace part of the all-purpose flour with ½–¾ cup whole wheat flour.
- For a baked version, place the dough on a lightly oiled baking sheet and bake at 350°F (180°C) for 25–30 minutes. Baked bannock will be denser than fried bannock.
- Bannock is best enjoyed fresh rather than stored for an extended period.
Nutrition Facts
- Calories: 208kcal
- Fat: 3g
- Carbohydrates: 38g
- Fiber: 1g
- Protein: 5g


)