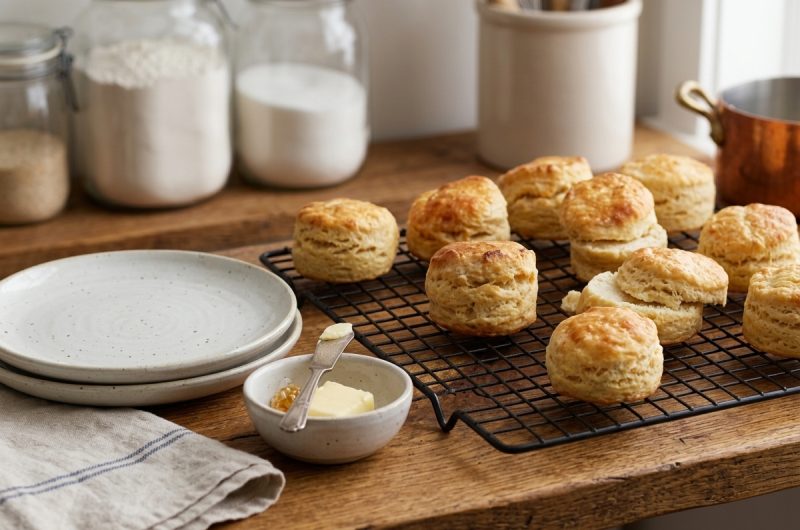
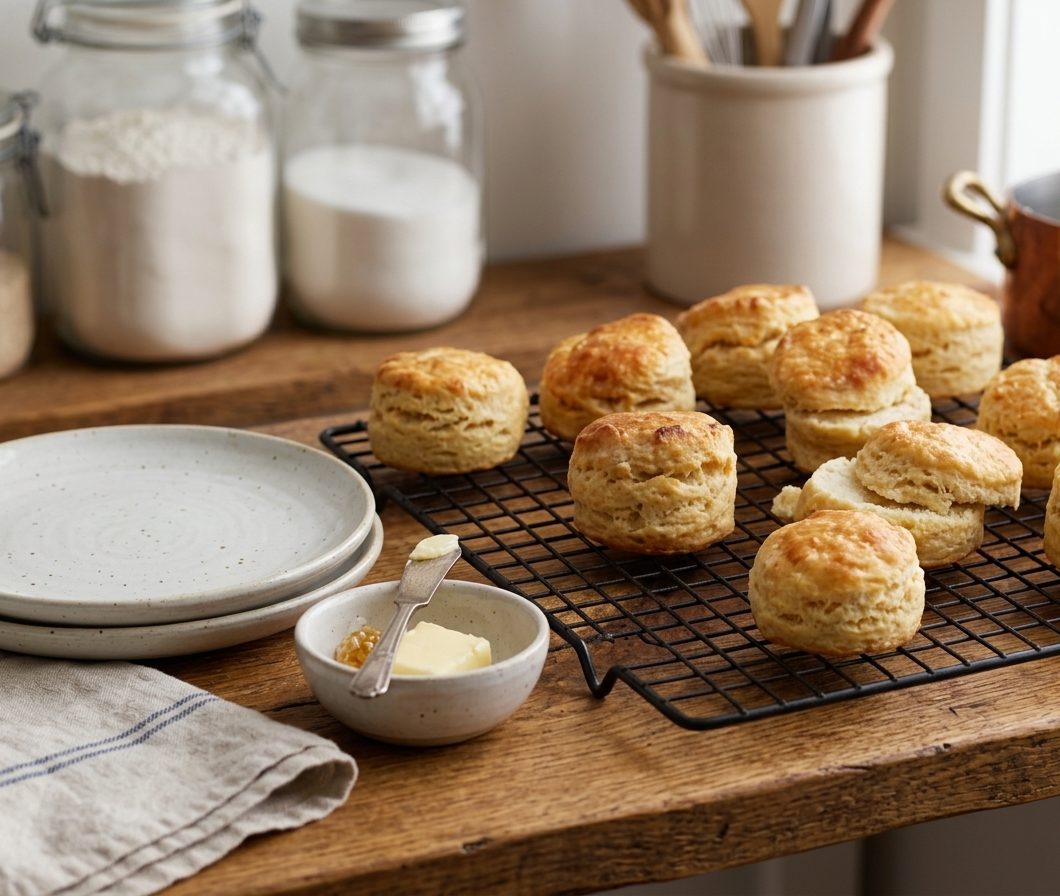
Gluten-free buttermilk biscuits are a comforting homemade favorite with golden tops, tender centers, and a rich buttery flavor. This easy gluten-free biscuit recipe is made without yeast, so there is no waiting for dough to rise. With cold butter, buttermilk, gluten-free flour, and a few simple baking ingredients, you can have warm biscuits on the table in about 30 minutes. They are perfect for breakfast, brunch, dinner, or serving alongside soups and stews.
Why These Gluten-Free Biscuits Work
Soft, Fluffy Texture
Getting soft gluten-free biscuits can be challenging because gluten-free flour does not behave like traditional wheat flour. This recipe uses a combination of gluten-free all-purpose flour, baking powder, buttermilk, butter, and egg to create a tender texture. The dough stays slightly sticky, which is completely normal. The most important step is to avoid overmixing, since too much handling can make the finished biscuits heavy rather than light and fluffy.
Buttery Layers
Cold butter is one of the secrets behind these flaky buttermilk biscuits. When small pieces of butter are mixed into the flour and then exposed to the heat of the oven, the butter melts and helps create delicate layers. Folding the dough twice before shaping gives the biscuits extra structure without requiring a rolling pin. The result is a biscuit with a soft middle and buttery layers that can easily be pulled apart.
Ingredients You Need
Gluten-Free Flour
Use a gluten-free all-purpose flour blend suitable for baking. The recipe recommends Pillsbury gluten-free flour because different blends absorb liquid differently and can produce different textures. Some gluten-free flour blends may create wetter dough. The recipe notes that certain blends may need the flour increased to 2½ cups for a fluffier result. Also check whether your flour already contains xanthan gum before adding the listed amount.
Buttermilk and Butter
Buttermilk gives these biscuits their classic tangy flavor while adding moisture to the dough. Cold unsalted butter helps produce a tender and flaky texture. Keeping both ingredients cold is important. Warm butter can blend too completely into the flour, reducing the pockets that help create layers during baking.
Supporting Ingredients
Baking powder provides the rise, while salt balances the flavor. Granulated sugar gives the biscuits a slight sweetness, and the egg helps bind the ingredients and support the structure of the dough. Together, these ingredients create biscuits that are soft inside while developing a lightly golden exterior during baking.
How to Make Gluten-Free Buttermilk Biscuits
Prepare the Oven
Preheat the oven to 450°F (232°C). Grease a large cast-iron pan or baking sheet so the biscuits are ready to go into the oven as soon as they are shaped. A fully preheated oven helps the cold butter react quickly with the heat, which is important for achieving better rise and texture.
Combine the Dry Ingredients
Place the gluten-free flour, xanthan gum if needed, baking powder, salt, and sugar in a large bowl. Whisk or stir until everything is evenly combined. Mixing the dry ingredients first ensures that the baking powder and salt are distributed throughout the flour before the wet ingredients are added.
Chill the Butter
Cut the butter into small pieces and place it in the freezer for about 10 minutes. Add the chilled butter to the flour mixture and cut it in using a pastry cutter or fork. Continue until the butter pieces are about the size of small peas. Do not blend the butter until the mixture becomes completely smooth because those small pieces are what help create flaky layers.
Add the Buttermilk and Egg
Whisk the egg into the cold buttermilk, then add the mixture to the bowl. Stir gently until a soft, sticky dough forms. Avoid kneading or mixing for too long. The dough should look somewhat shaggy and uneven rather than smooth. This light handling helps preserve the texture needed for tender biscuits.
Fold the Dough
Place a large piece of parchment paper on the counter and sprinkle it with one tablespoon of gluten-free flour. Transfer the dough onto the parchment and dust the top with another tablespoon of flour. Do not roll the dough. Instead, gently fold it over itself twice. This simple technique helps form layers without pressing the dough too much.
Shape and Cut
Use your hands to shape the dough into a round about 7 inches in diameter and 1 inch thick. Keeping the dough thick is important because flattening it too much can result in hard, low biscuits. Cut 2-inch biscuits using a biscuit cutter, glass, or jar lid. Press straight down without twisting. Twisting can seal the edges and make it more difficult for the biscuits to rise properly.
Bake Until Golden
Arrange the biscuits on the greased pan or baking sheet. Gather the remaining dough gently and cut additional biscuits until all the dough is used. Bake at 450°F (232°C) for 15–20 minutes. Start checking around 15 minutes because oven temperatures vary. The biscuits should have golden-brown tops and look fully baked in the center.
Finish With Butter
For extra flavor, brush melted butter over the warm biscuits as soon as they come out of the oven. Serve them warm while the centers are still soft and the edges are tender. Freshly baked biscuits pair beautifully with butter, jam, honey, eggs, gravy, soups, stews, and many savory dinner dishes.
Tips for Better Gluten-Free Biscuits
Keep Everything Cold
Cold ingredients are especially important for flaky biscuits. Keep the butter and buttermilk refrigerated until they are needed, and chill the butter before cutting it into the flour. If your kitchen is warm, even the flour can be chilled. Keeping the dough cool helps prevent the butter from melting before the biscuits reach the oven.
Do Not Overmix
The dough should only be mixed until the ingredients come together. Overworking it can produce biscuits that are dense and tough. Gluten-free dough may feel sticky, but that does not mean you need to keep adding flour. A soft dough generally produces a more tender biscuit once baked.
Measure Flour Carefully
Use the spoon-and-level method when measuring gluten-free flour. Spoon the flour into the measuring cup and level it with a knife. Avoid scooping directly from the flour container because the flour can become packed, resulting in too much flour and a drier dough.
Serving Ideas
Breakfast and Brunch
These gluten-free buttermilk biscuits make an excellent breakfast side. Serve them with scrambled or fried eggs, breakfast potatoes, cheese, or fruit preserves. They can also be split and filled with eggs and other breakfast favorites to create a simple homemade biscuit sandwich.
Lunch and Dinner
Serve the biscuits alongside chicken, roasted vegetables, soups, or hearty stews. Their tender texture makes them especially useful for soaking up gravy or savory sauces. They are also a convenient gluten-free bread option for family dinners and holiday meals.
Sweet or Savory
The mild buttery flavor works with both sweet and savory toppings. Add butter, honey, jam, or preserves for a simple treat, or serve the biscuits with cheese, eggs, or gravy for a savory option.
Notes
Gluten-Free Flour Differences
Different gluten-free flour blends can produce different results because their ingredients and absorption levels vary. Pillsbury gluten-free flour is recommended in the recipe. For certain wetter blends, the original notes suggest increasing the flour to 2½ cups. Check the flour package to determine whether xanthan gum is already included.
Dairy-Free and Egg-Free Options
For a dairy-free version, the recipe allows almond, cashew, or coconut milk combined with vinegar to create dairy-free buttermilk, along with dairy-free butter, shortening, or a suitable vegan butter. For an egg-free version, use Bob’s Red Mill Egg Replacer as specified in the original recipe.
Frequently Asked Questions
Can I Make Buttermilk at Home?
Yes. Combine 1 cup of milk with 1 tablespoon of white vinegar or lemon juice and let it stand for 5–10 minutes. Keep it refrigerated so the homemade buttermilk stays cold before adding it to the dough.
Why Should I Avoid Twisting the Biscuit Cutter?
Twisting the cutter can compress the edges of the dough. Pressing straight down helps keep the edges open, allowing the biscuits to rise more effectively as they bake.
Why Are My Biscuits Flat?
Flat biscuits can happen when the dough is rolled too thin, the butter becomes too warm, the dough is overmixed, or the cutter is twisted. Keep the dough about 1 inch thick, work gently, and bake immediately after shaping for the best rise.
Can I Use Other Gluten-Free Flour?
Yes, but results may vary between blends. Some flour combinations create wetter dough and may require more flour according to the original recipe notes. For the most predictable texture, use a gluten-free all-purpose baking blend with consistent results.
Can I Make the Dough Ahead of Time?
These biscuits are designed to be prepared and baked without a rising period. For the most consistent results, mix and shape the dough shortly before baking, while the butter is still cold. If you prepare the dough too far in advance, the butter may soften and the baking powder may lose some of its effectiveness. Freshly prepared dough is the simplest way to maintain the intended texture.
Gluten-Free Buttermilk Biscuits
 Recipe by admin
Soft, fluffy, buttery biscuits with golden tops and tender centers.
12
servings15
minutes15
minutes143
kcal30
minutesIngredients
2 cups (270 g) gluten-free all-purpose flour
½ tsp (1.5 g) xanthan gum, omit if flour already contains it
1 tbsp (14 g) gluten-free baking powder
1 tsp (6 g) salt
2 tbsp (25 g) granulated sugar
1 cup (240 ml) buttermilk
6 tbsp (85 g) unsalted butter
1 large egg
2 tbsp (15 g) gluten-free all-purpose flour, for shaping
Directions
- Preheat the oven to 450°F (232°C). Grease a large cast-iron pan or baking sheet.
- Whisk together the gluten-free flour, xanthan gum if needed, baking powder, salt, and sugar in a large bowl.
- Cut the butter into small pieces and freeze for 10 minutes. Cut it into the flour mixture with a pastry cutter or fork until the pieces are about the size of small peas.
- Whisk the egg into the cold buttermilk. Add to the flour mixture and stir gently until a soft, sticky dough forms. Do not overmix.
- Sprinkle a large piece of parchment paper with 1 tablespoon of gluten-free flour. Place the dough on it and dust the top with the remaining flour.
- Fold the dough in half twice, gently. Shape it by hand into a round about 7 inches wide and 1 inch thick. Do not roll it out.
- Cut 2-inch biscuits straight down without twisting the cutter. Gather the scraps gently and cut the remaining biscuits. Arrange on the prepared pan.
- Bake for 15–20 minutes, checking at 15 minutes, until the tops are golden brown.
- Brush the warm biscuits with melted butter if desired. Serve warm.
Notes
- Flour: Pillsbury gluten-free flour is recommended in the original recipe. Other blends may need additional flour; the original notes suggest 2½ cups for certain wetter blends.
- Buttermilk substitute: Add 1 tablespoon of white vinegar or lemon juice to 1 cup of milk. Refrigerate for 5–10 minutes.
- Dairy-free: Use suitable dairy-free milk with vinegar and dairy-free butter or shortening.
- Egg-free: Use an egg replacer according to its package directions.
- Measuring: Spoon flour into the measuring cup and level it rather than scooping directly from the bag.
- Texture: Keep ingredients cold and avoid overmixing for softer, flakier biscuits.
Nutrition Facts
- Calories: 143kcal
- Fat: 7g
- Carbohydrates: 17g
- Fiber: 2g
- Sugar: 3g
- Protein: 3g