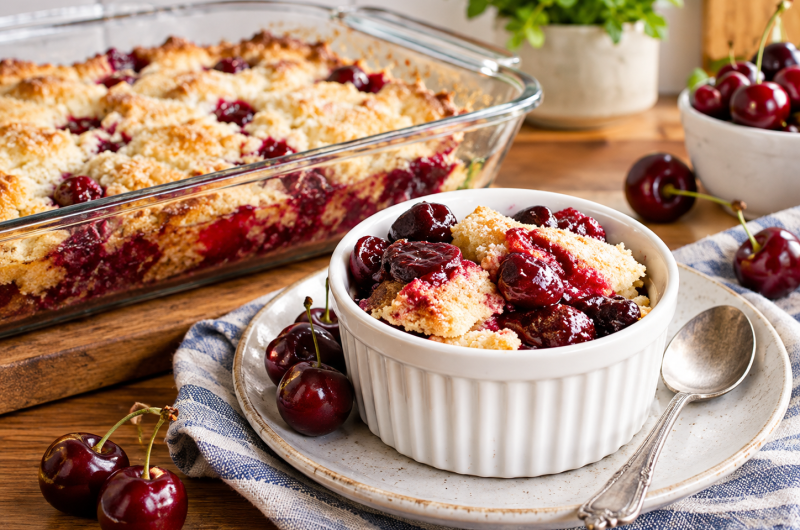
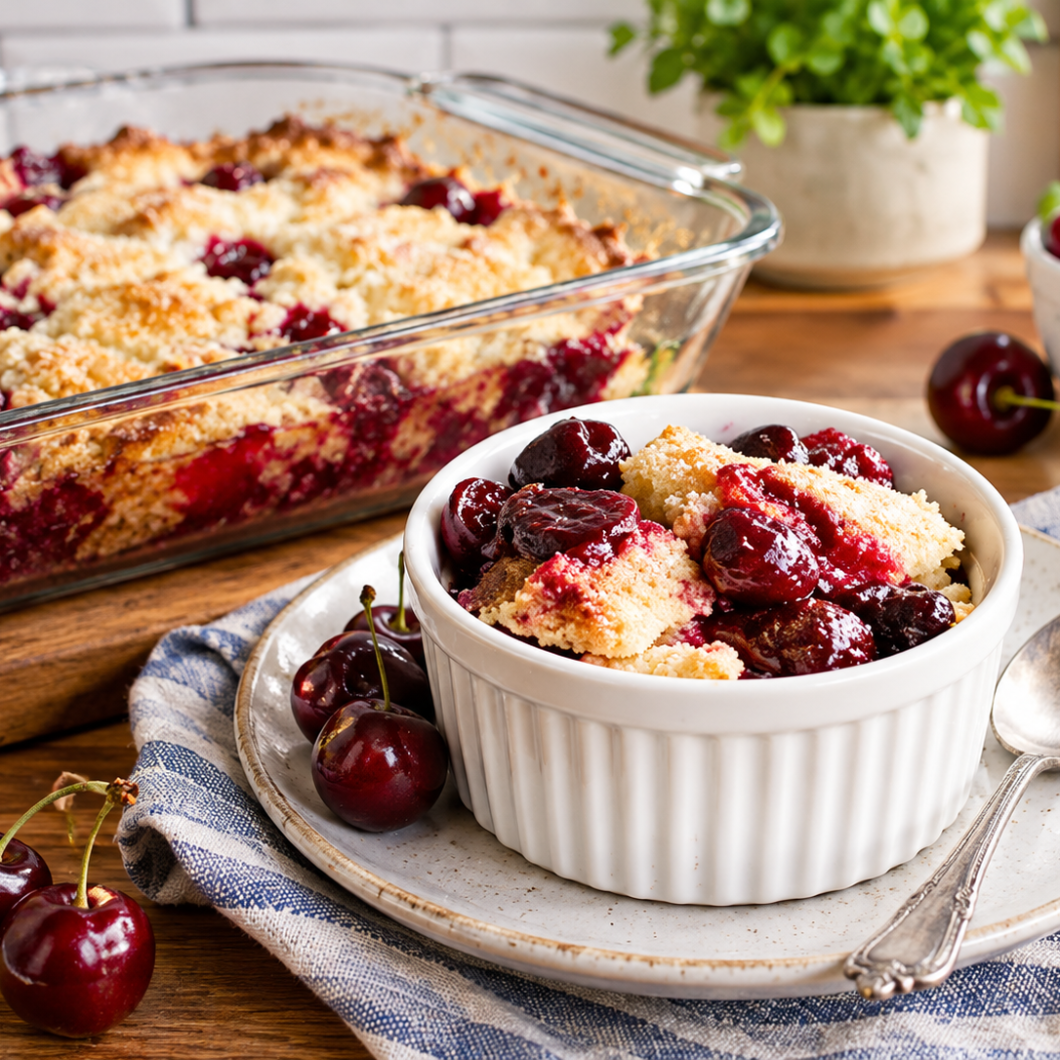
Gluten Free Cherry Cobbler is a simple fruit dessert that brings together juicy sweet cherries, almond flour, gluten free flour, and a soft biscuit-style topping. The cherries become tender and syrupy as they bake, while the topping develops a lightly crisp, golden surface with a soft center. A small amount of almond extract gives the entire dessert a pleasant nutty aroma that works especially well with cherries.
A Simple Summer Cherry Dessert
When fresh cherries are available, this cobbler is an excellent way to turn them into a warm homemade dessert. However, fresh fruit is not required. Thawed frozen sweet cherries work beautifully too, making this recipe practical throughout the year. Since the filling uses only cherries, lemon juice, and almond extract, the natural flavor of the fruit remains the main focus rather than being covered by a heavy sauce.
This gluten free cherry dessert is especially useful when you want something that feels homemade without requiring a complicated pastry crust. Instead of preparing a pie dough or making a separate fruit sauce, the cherries are placed directly into the baking dish and covered with the prepared topping. The butter melts into the topping during baking, helping create the rich golden finish that makes a cobbler so inviting.
Why Almond and Cherry Work So Well Together
Cherry and almond are a classic flavor pairing, and this recipe uses that combination in several simple ways. Almond flour adds a subtle richness to the topping, while almond extract is used in both the fruit layer and the topping. The result is a dessert with a noticeable almond aroma without overpowering the natural sweetness of the cherries.
The almond flour also gives the topping a slightly different texture from a traditional flour-based cobbler. Combined with gluten free flour, sugar, baking powder, egg, and heavy cream, it creates a mixture that becomes tender as it bakes. The topping is intentionally simple, allowing the cherries and almond flavor to remain prominent in every serving.
Choosing the Right Cherries
Sweet cherries are the best choice for this recipe because their natural sweetness balances the slightly tangy lemon juice. You can use fresh sweet cherries when they are in season or choose frozen sweet cherries when fresh fruit is unavailable. If using frozen cherries, thaw them before adding them to the baking dish according to the recipe instructions.
It is important to use sweet cherries rather than tart cherries because the recipe was designed around the flavor and sweetness of sweet fruit. Tart cherries have a much sharper flavor and would change the overall balance of the dessert. If you enjoy buying frozen fruit for convenience, pitted frozen cherries are particularly useful because they remove one of the most time-consuming preparation steps.
Fresh or Frozen Cherries?
Both fresh and frozen cherries can produce a delicious cobbler. Fresh cherries provide a particularly vibrant fruit flavor during cherry season, while frozen cherries make the recipe much easier to prepare outside the peak summer months. Since frozen cherries are already commonly available without pits, they can save considerable preparation time.
If using frozen cherries, thaw them before making the filling. The original preparation also allows the frozen cherries to sit on the grill while it heats, which can help them warm gradually. Whichever option you choose, make sure the cherries are pitted before they go into the baking dish. Accidentally leaving pits in the fruit can make an otherwise easy dessert inconvenient to eat.
How to Pit Fresh Cherries
A cherry pitter is one of the easiest tools for preparing fresh cherries. It holds the fruit in place while pushing the pit out through the center. If you are working with several cups of cherries, a pitter can make the process much faster and less frustrating than trying to remove each pit with a knife.
Cherry juice can stain surfaces and clothing, so it is worth preparing the fruit in an area that is easy to clean. The cherries may release small amounts of juice as their pits are removed, particularly when they are very ripe. Once the cherries are pitted, they are ready to be placed directly into the baking dish and combined with the lemon juice and almond extract.
Preparing the Cherry Filling
The fruit layer is one of the easiest parts of this gluten free cobbler. Add the six cups of pitted sweet cherries to a 9×13-inch baking dish, then toss them with lemon juice and almond extract. There is no need to prepare a separate thickener or cook the cherries on the stovetop before assembling the dessert.
The lemon juice adds a mild brightness that keeps the sweet cherries from tasting overly heavy. At the same time, the almond extract introduces the flavor that ties the fruit together with the topping. As the cobbler bakes, the cherries soften and release their juices, creating a naturally flavorful fruit layer underneath the golden topping.
Making the Gluten Free Cobbler Topping
The topping begins with equal amounts of almond flour and gluten free flour. This combination provides a balanced base for the cobbler while keeping the recipe gluten free when a certified gluten free flour is used. Sugar, baking powder, and salt are whisked into the flour mixture to distribute the dry ingredients evenly and reduce lumps.
In a separate bowl, the egg, heavy cream, and almond extract are combined. These wet ingredients are then added to the dry mixture. The resulting mixture will be crumbly rather than looking like a smooth cake batter. That texture is completely suitable for this cobbler because the topping is placed over the cherries rather than poured into the dish.
Why the Butter Goes on Top
One of the convenient features of this recipe is the way the butter is added. Instead of cutting cold butter into the flour mixture, six tablespoons of unsalted butter are sliced thinly and arranged across the top of the cobbler mixture. This approach reduces preparation work and eliminates the need for a pastry cutter or additional mixing.
As the cobbler cooks, the butter melts and works its way into the topping. It helps the surface become rich and golden while contributing to the tender texture underneath. Arranging the slices as evenly as possible helps distribute the butter across the topping so that the finished dessert cooks more consistently.
Adding Decorator’s Sugar
A final sprinkle of decorator’s sugar provides an extra touch of sweetness and texture. The sugar sits on the surface during baking and contributes to the lightly crisp exterior of the cobbler. It is a small addition, but it helps make the finished dessert look more polished and gives each bite a pleasant contrast between the soft fruit and the topping.
The decorator’s sugar is added after the butter slices have been distributed. This ensures the sugar remains on the surface as the cobbler bakes. Once the top turns golden brown and the topping has cooked through, the dessert is ready to come off the grill.
Cooking Cherry Cobbler on the Grill
This recipe is particularly convenient for outdoor cooking because the cobbler can be baked on a preheated grill. Set the Traeger to smoke with the lid open for about five minutes, then close the lid and bring the temperature to 375°F. Once the grill is ready, place the assembled cobbler inside and close the lid.
Cooking the dessert on the grill is useful during warm weather because it keeps the preparation outdoors instead of requiring the kitchen oven. The covered grill provides the steady heat needed for the topping to cook while the cherries soften underneath. It also makes this dessert a fun option for summer gatherings and outdoor meals.
Why 375°F Works Well
A temperature of 375°F provides enough heat for the topping to cook through while allowing the surface to develop a golden brown color. The cobbler takes about 60 minutes at this temperature. The topping needs time to become fully cooked because it contains flour, almond flour, egg, and cream rather than being a thin layer of batter.
Using a higher temperature could cause the surface to brown before the interior has finished cooking. A lower temperature may extend the cooking time and can make it more difficult to achieve the desired golden exterior. Keeping the grill at 375°F gives the dessert enough time to develop the contrast between the tender cherry filling and browned topping.
How to Tell When the Cobbler Is Done
The most noticeable sign that the cobbler is ready is the appearance of the topping. After approximately 60 minutes, the surface should be golden brown and look fully baked. Because the topping is spread over a generous amount of fruit, it is important not to judge doneness solely by the cherries underneath.
The finished dessert should have a cooked, golden topping with a tender texture. If the surface is browning too quickly, the temperature should be checked to ensure the grill is maintaining the intended 375°F setting. Allowing the full cooking time helps the topping cook properly rather than leaving a doughy center.
Serving Gluten Free Cherry Cobbler
This cherry cobbler is best served warm when the fruit is soft and juicy and the topping is still pleasantly tender. The contrast between the warm cherries and golden topping makes it especially appealing as a summer dessert. It can be portioned directly from the baking dish, making it convenient for family dinners, casual gatherings, or outdoor meals.
Because the recipe produces eight servings, it works well when you want a dessert that can be shared without assembling individual portions. The large 9×13-inch baking dish also makes it practical for entertaining. Each serving contains a combination of fruit, almond-flavored topping, and buttery sweetness.
A Dessert for Summer Gatherings
A warm cherry cobbler is an especially good choice for summer because cherries are naturally associated with the season, while grill cooking keeps the preparation outdoors. Instead of heating the entire kitchen, you can prepare the cobbler while other food is being cooked on the grill.
The recipe is also straightforward enough to prepare ahead of the main meal. The cherries can be prepared and the topping mixed before cooking, allowing the cobbler to go onto the preheated grill when you are ready. Its familiar fruit-and-biscuit combination makes it an approachable dessert for both casual family meals and larger gatherings.
Keeping the Recipe Gluten Free
The topping uses gluten free flour along with almond flour rather than traditional all-purpose flour. To keep the finished cobbler gluten free, choose a gluten free flour product that is appropriate for baking and check the packaging if cross-contact is a concern. The ingredient list itself does not require any complicated gluten free specialty products beyond the flour.
Almond flour adds another layer of flavor while complementing the cherries. The combination also creates a topping with a texture that is slightly different from a conventional wheat-flour cobbler. For anyone looking for an easy gluten free fruit dessert, this combination offers a practical alternative without requiring a separate gluten free pie crust.
Notes for the Best Results
Use sweet cherries, whether fresh or frozen, because they provide the intended flavor for the recipe. If using fresh cherries, pit them carefully before adding them to the dish. If using frozen cherries, thaw them as directed. Keeping the cherry pieces intact rather than crushing them helps preserve the texture of the fruit as it cooks.
When preparing the topping, whisk the dry ingredients well before adding the wet mixture. The finished mixture is expected to be crumbly, so avoid trying to turn it into a smooth batter. Spread the mixture over the cherries as evenly as possible, then arrange the thin butter slices across the surface before adding the decorator’s sugar.
Notes on Grill Cooking
If you are using a Traeger grill, follow the specified heating process and allow it to reach 375°F before baking the assembled cobbler. Keep the lid closed during cooking so the grill can maintain a steady temperature. Opening the lid repeatedly can release heat and may increase the cooking time.
The cobbler should bake for around one hour at 375°F. Cooking time can vary slightly depending on the grill and the temperature it maintains, so the golden-brown appearance of the topping remains an important visual guide. Once the surface is fully browned and the topping has cooked through, the cobbler is ready to serve.
Storing and Enjoying Leftovers
If you have leftover cherry cobbler, allow it to cool before storing it appropriately. The fruit filling will remain soft as it sits, while the topping may lose some of its freshly baked crispness. Gently reheating individual portions can help restore some of the warmth and softness that make this dessert particularly enjoyable.
The recipe is designed as a straightforward eight-serving dessert, so leftovers can be useful for another dessert serving later. Reheating should be done gently to avoid drying the topping. Whether served freshly baked or warmed later, the combination of sweet cherries and almond remains the central flavor of the dish.
Why This Recipe Is Worth Making
Gluten Free Cherry Cobbler offers a practical alternative to traditional cherry pie when you want a fruit dessert without preparing a pastry crust. The recipe uses a short ingredient list, requires straightforward assembly, and can be cooked outdoors on a grill. Sweet cherries provide the juicy fruit layer, while almond flour and almond extract add a complementary flavor to the topping.
The result is a comforting homemade dessert with a soft fruit center and golden topping. Its flexible use of fresh or frozen cherries makes it suitable for different seasons, while the gluten free flour combination makes it useful for gluten-free dessert menus. With about ten minutes of preparation and approximately one hour of cooking, it is an uncomplicated way to turn cherries into a satisfying baked dessert.
Gluten-Free Cherry Cobbler
 Recipe by admin
A warm gluten free cherry cobbler made with sweet fresh or frozen cherries, almond flour, gluten free flour, and a golden buttery topping.
8
servings10
minutes1
hour331
kcal1
hour10
minutesIngredients
- Filling
6 cups sweet cherries, pitted, fresh or thawed frozen
1/4 teaspoon almond extract
1 tablespoon lemon juice
- Topping
3/4 cup almond flour
3/4 cup gluten free flour
1 cup sugar
1 teaspoon baking powder
1/2 teaspoon salt
1 large egg, room temperature
1/2 cup heavy cream
1/4 teaspoon almond extract
6 tablespoons unsalted butter
1 tablespoon decorator’s sugar
Directions
- Set the Traeger to smoke with the lid open for about 5 minutes. Close the lid and set the grill temperature to 375°F.
- Place the 6 cups of pitted sweet cherries in a 9×13-inch baking dish. Add the lemon juice and 1/4 teaspoon almond extract, then toss gently to coat the cherries.
- If using frozen cherries, they can be placed on the grill while it is heating.
- In a medium bowl, whisk together the almond flour, gluten free flour, sugar, baking powder, and salt until evenly combined and free of noticeable lumps.
- In another bowl, combine the egg, heavy cream, and 1/4 teaspoon almond extract. Add the wet mixture to the dry ingredients and mix until combined. The mixture will be crumbly.
- Spread the topping mixture evenly over the cherries in the baking dish.
- Cut the unsalted butter into thin slices and distribute the slices as evenly as possible over the topping.
- Sprinkle the decorator’s sugar over the surface.
- Place the baking dish on the preheated grill and close the lid.
- Bake for approximately 60 minutes, or until the topping is golden brown and cooked through.
Nutrition Facts
- Calories: 331kcal
- Fat: 12g
- Carbohydrates: 54g
- Fiber: 4g
- Sugar: 40g
- Protein: 5g