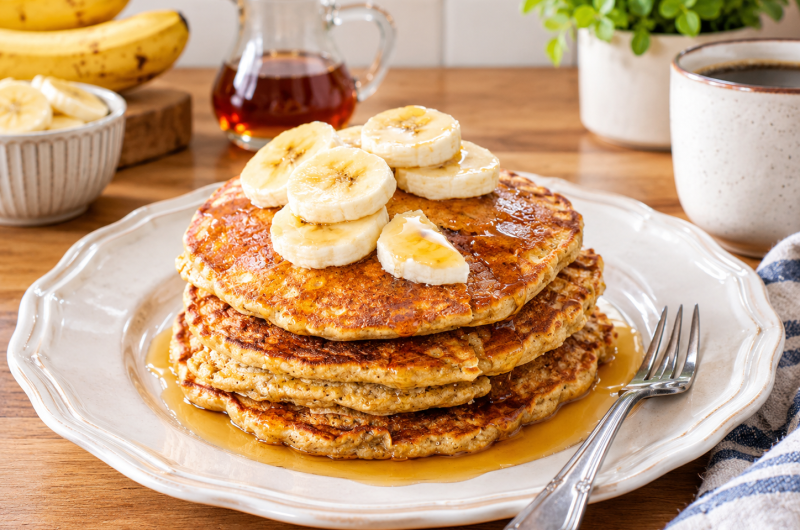
Banana oat pancakes are a simple way to make a wholesome breakfast feel special without relying on complicated ingredients or a long cooking process. These pancakes have a soft, tender center, lightly golden edges, and a naturally sweet banana flavor that pairs beautifully with warm cinnamon and nutmeg.
Made with oat flour instead of regular wheat flour, they are also a convenient gluten-free breakfast when certified gluten-free oats are used. Whether you are preparing a relaxed weekend breakfast or planning a casual brunch, these homemade banana pancakes are easy to fit into your routine.
These Banana Oat Pancakes
There is a lot to like about this banana oat pancake recipe. The batter combines oat flour with mashed bananas, eggs, maple syrup, and a small amount of butter or coconut oil, creating pancakes that are filling without tasting heavy. The bananas provide most of the sweetness and also help keep the pancakes moist. Cinnamon and nutmeg add a gentle warmth, while lemon juice works with the baking soda to help produce a lighter texture.
Another advantage is that oat flour is extremely easy to prepare at home. If you have old-fashioned oats and a food processor or blender, you can make the flour yourself instead of buying a separate bag. Simply process the oats until they resemble a fine, flour-like texture. This makes the recipe especially useful when you want homemade oat pancakes but do not regularly keep oat flour in your pantry.
What Makes the Pancakes Fluffy?
The lemon juice and baking soda
The combination of lemon juice and baking soda plays an important role in the texture of these pancakes. Baking soda needs acidity to activate properly, and the lemon juice supplies that acidity. When the two ingredients interact in the batter, they create small bubbles that help the pancakes become lighter as they cook. The lemon juice also gives the batter a subtle brightness without making the finished pancakes taste strongly of lemon.
The resting time
One step that should not be skipped is allowing the batter to rest for about 10 minutes before cooking. Oat flour behaves differently from traditional wheat flour and needs some time to absorb the liquid in the mixture. Immediately after stirring, the batter may look relatively loose, but it becomes noticeably thicker after resting. This short pause helps the batter become easier to portion onto the skillet and contributes to a better pancake texture.
Choosing the Right Bananas
Very ripe bananas work particularly well for this recipe because they are naturally sweeter and softer than yellow-green bananas. Their soft texture makes them easy to mash, while their stronger banana flavor carries through the finished pancakes. If your bananas have developed plenty of brown spots, they are ideal for this recipe.
For the best consistency, mash the bananas thoroughly before adding them to the wet ingredients. Small pieces are not necessarily a problem, but a mostly smooth banana mixture distributes the moisture and sweetness more evenly throughout the batter. Measuring the mashed bananas is also helpful because the recipe calls for a specific amount rather than simply relying on a number of bananas.
How to Make Banana Oat Pancakes
Mix the dry ingredients
Begin by combining the oat flour, baking soda, salt, cinnamon, and ground nutmeg in a medium bowl. Whisk everything together so the baking soda and spices are evenly distributed throughout the flour. This simple step helps prevent concentrated pockets of baking soda or spices from appearing in individual pancakes.
Prepare the banana mixture
In another bowl, combine the mashed bananas with the melted unsalted butter or coconut oil, maple syrup, and lemon juice. Add the eggs and whisk until the mixture is well blended. If the melted butter begins to solidify after it comes into contact with the cooler banana mixture, warm the mixture briefly in the microwave in short intervals, stirring between each one, until the ingredients become fluid again.
Combine without overmixing
Create a well in the center of the dry ingredients and pour in the banana mixture. Stir gently with a large spoon until the dry ingredients have been moistened. The goal is not to make the batter perfectly smooth. Overmixing can affect the final texture, so stop stirring as soon as the ingredients are combined.
At this stage, the batter may appear thicker than the batter used for traditional flour pancakes. That is normal. Allowing it to rest gives the oat flour time to absorb moisture and naturally thicken the mixture further.
Cooking the Pancakes
Preheat the cooking surface
After the batter has rested for about 10 minutes, heat a large skillet over medium-low heat. If you are using an electric griddle, it can be heated to 350°F. A skillet or griddle should be properly warmed before the batter is added, but it should not become excessively hot.
A useful test is to sprinkle a small drop of water onto the cooking surface. If it sizzles when it makes contact, the skillet is ready. Depending on the type of skillet you use, you may need a small amount of butter or oil to prevent sticking. Nonstick cookware may require very little or no additional fat.
Portion the batter
Use about ¼ cup of batter for each pancake. Leave a little space between pancakes because the batter can spread as it cooks. If the batter has become especially thick and does not spread naturally, gently stir in a tablespoon or two of milk or water to loosen it.
Avoid pressing the batter down excessively once it reaches the skillet. Keeping the pancakes reasonably thick helps preserve their soft, fluffy centers.
Know when to flip
Cook the first side for approximately 2 to 3 minutes, watching for small bubbles to appear on the surface. The underside should develop a golden-brown color before you flip the pancake. Because oat-based batter can be thicker than standard pancake batter, it can sometimes be difficult to judge the exact moment for flipping.
A timer can make the process easier. Start with about 2 minutes, then gently lift an edge to check the color. If it is not golden yet, give it another little time. Once flipped, the second side usually needs around 1 to 2 minutes. Keep an eye on the heat because pancakes can become dark on the outside before the center is completely cooked if the skillet is too hot.
Keeping the Pancakes Soft and Tender
The key to tender banana oat pancakes is gentle cooking. Medium-low heat gives the center enough time to cook while allowing the outside to develop a pleasant golden color. If the first few pancakes brown too quickly, reduce the heat before cooking the remaining batter.
It is also helpful to avoid adding too much butter or oil to the pan. A lightly greased surface is usually enough. Excess fat can make the edges cook unevenly and may interfere with the clean golden finish you want.
If you are cooking several batches, finished pancakes can be kept warm in an oven set to 200°F. Arrange them so they stay warm without becoming excessively dry. Serve them as soon as possible for the softest texture.
Serving Ideas for Banana Oat Pancakes
Fresh banana and maple syrup
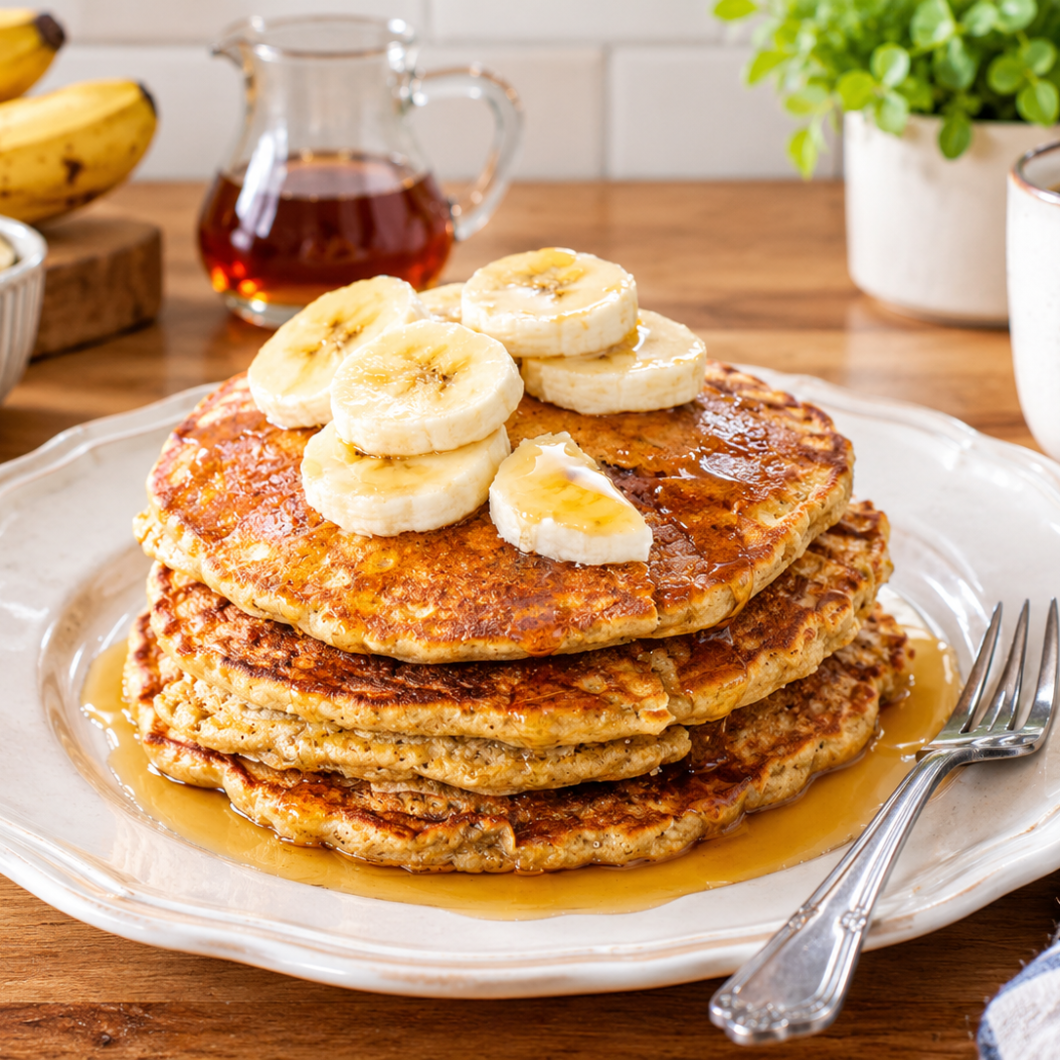
A simple topping of sliced banana and maple syrup highlights the flavors already present in the pancakes. The fresh banana adds a soft, fruity contrast while the maple syrup provides extra sweetness and a glossy finish. This combination works especially well for a relaxed weekend breakfast.
Nut butter
Peanut butter, almond butter, or another favorite nut butter can turn these pancakes into a more substantial breakfast. Spread a small amount between pancakes or drizzle it over the top. The creamy texture and nutty flavor pair naturally with banana and cinnamon.
Yogurt and fruit
For a lighter, fresh-tasting serving, add Greek yogurt and sliced fruit. Berries, additional banana, or other seasonal fruit can bring color and freshness to the plate. Greek yogurt also adds protein, making it a useful pairing when you want a more balanced breakfast.
Whipped cream and butter
If you are making these pancakes for brunch or a special breakfast, a small amount of whipped cream or salted butter makes them feel more indulgent. A drizzle of maple syrup over the top completes the plate without requiring a complicated topping.
Making Your Own Oat Flour
Food processor method
Homemade oat flour takes only a few minutes. Place old-fashioned oats into a food processor and process until they have a fine, flour-like consistency. The finished texture should resemble fine sand rather than large oat flakes. For the most consistent results, process the oats thoroughly and check for larger pieces before measuring the flour.
If you are following a gluten-free diet, choose oats specifically labeled or certified gluten-free. Oats themselves do not naturally contain gluten, but they can come into contact with gluten-containing grains during processing and packaging.
Recipe Variations
Dairy-free banana oat pancakes
For a dairy-free version, use coconut oil in place of the unsalted butter. The recipe already provides this option, so there is no need to change the quantity. Coconut oil also works well with banana and cinnamon, giving the pancakes a subtly warm flavor.
Gluten-free banana pancakes
These pancakes can be suitable for a gluten-free diet when certified gluten-free oat flour or certified gluten-free old-fashioned oats are used. Always check the packaging if gluten avoidance is important for you, because ordinary oats may be processed in facilities that also handle wheat or other gluten-containing grains.
Egg-free option
If you need an egg-free variation, flax eggs can be used as a substitute according to the original preparation notes. The texture may vary somewhat from the standard version, so the batter should still be handled gently and cooked over moderate heat.
Storage and Reheating
Leftover banana oat pancakes can be stored in the refrigerator for up to four days. Allow them to cool before placing them in a suitable airtight container. When you are ready to eat them, gently reheat the pancakes in the microwave. Wrapping the stack in a paper towel while reheating can help manage excess moisture.
For longer storage, the cooked pancakes can be frozen for up to three months. Freeze them in a way that prevents them from sticking together, then transfer them to a suitable freezer-safe container or bag. When you want a quick breakfast, reheat only the amount you need.
Notes
Use certified gluten-free oats
The recipe itself uses oat flour rather than wheat flour, but anyone who needs a strictly gluten-free breakfast should select certified gluten-free oat flour or certified gluten-free old-fashioned oats.
Do not skip the resting period
The 10-minute rest allows the oat flour to absorb moisture and gives the batter time to thicken. This makes the pancakes easier to cook and helps produce a more consistent texture.
Watch the heat
If the outside of the pancakes becomes dark before the center is fully cooked, lower the heat. Oat and banana pancakes can brown quickly because of their natural sugars, so medium-low heat is generally more reliable than high heat.
Make the batter fresh
For the best texture, prepare and cook the pancakes shortly after mixing and resting the batter. The resting period is useful, but the batter does not need to sit for an extended period before cooking.
Gluten-Free Banana Oat Pancakes
 Recipe by admin
Fluffy banana oat pancakes made with oat flour, ripe mashed bananas, maple syrup, warm cinnamon, and nutmeg.
8
servings15
minutes10
minutes25
minutesIngredients
1 cup oat flour
½ teaspoon baking soda
½ teaspoon salt
½ teaspoon ground cinnamon
¼ teaspoon ground nutmeg
Scant 1 ¼ cup mashed bananas (about 3 small bananas, mashed, or 9.5 ounces)
2 tablespoons melted unsalted butter or coconut oil, plus more for cooking
2 tablespoons maple syrup
1 tablespoon lemon juice
2 eggs
Directions
- In a medium bowl, whisk together the oat flour, baking soda, salt, cinnamon, and nutmeg until evenly combined.
- In a separate small bowl, mix the mashed bananas with the melted butter or coconut oil, maple syrup, and lemon juice. Add the eggs and whisk until blended.
- If the butter begins to solidify after mixing with the bananas, warm the mixture in short 15-second microwave intervals, stirring between each interval until it becomes liquid again.
- Make a well in the center of the dry ingredients. Pour in the banana mixture and gently stir until all of the dry ingredients are moistened. Avoid overmixing.
- Allow the batter to rest for 10 minutes so the oat flour can absorb the moisture and thicken the mixture. If using an electric griddle, preheat it to 350°F during this time.
- Heat a large skillet over medium-low heat. Test the surface with a drop of water; it should sizzle when it touches the hot pan. Lightly grease the skillet with butter or oil if needed.
- Scoop approximately ¼ cup of batter onto the skillet for each pancake, leaving space between them. If the batter is too thick to spread naturally, gently mix in 1 to 2 tablespoons of milk or water.
- Cook for about 2 to 3 minutes, or until small bubbles appear on the surface and the underside is golden.
- Carefully flip each pancake and cook for another 1 to 2 minutes, until lightly golden and cooked through.
- Continue with the remaining batter. If the pancakes brown too quickly, reduce the heat and add a small amount of additional butter or oil when necessary.
- Serve immediately, or keep the cooked pancakes warm in a 200°F oven until ready to serve.
Notes
- For a gluten-free recipe, use certified gluten-free oat flour or certified gluten-free old-fashioned oats.
- To make homemade oat flour, process old-fashioned oats in a food processor until they reach a fine, flour-like consistency.
- For a dairy-free version, use coconut oil instead of butter.
- For an egg-free variation, flax eggs can be used as a substitute.
- Leftover pancakes can be refrigerated for up to 4 days.
- Cooked pancakes can be frozen for up to 3 months.
- Reheat refrigerated or frozen pancakes gently in the microwave, using a paper towel around the stack to help manage moisture.