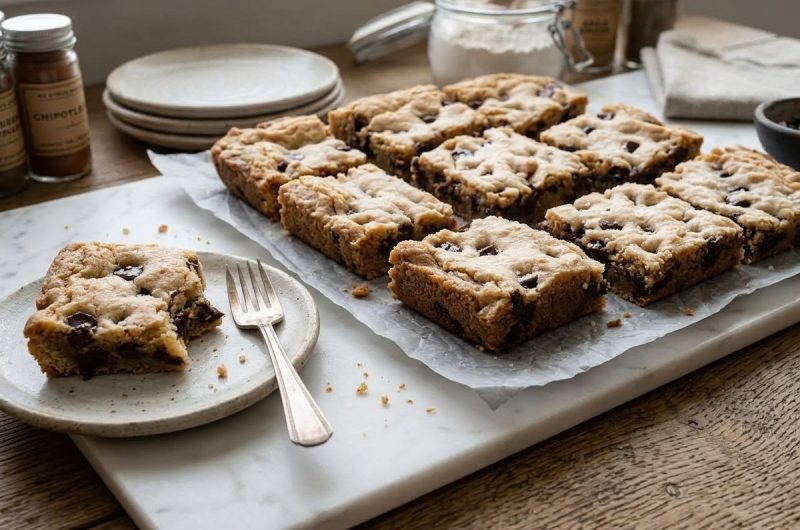
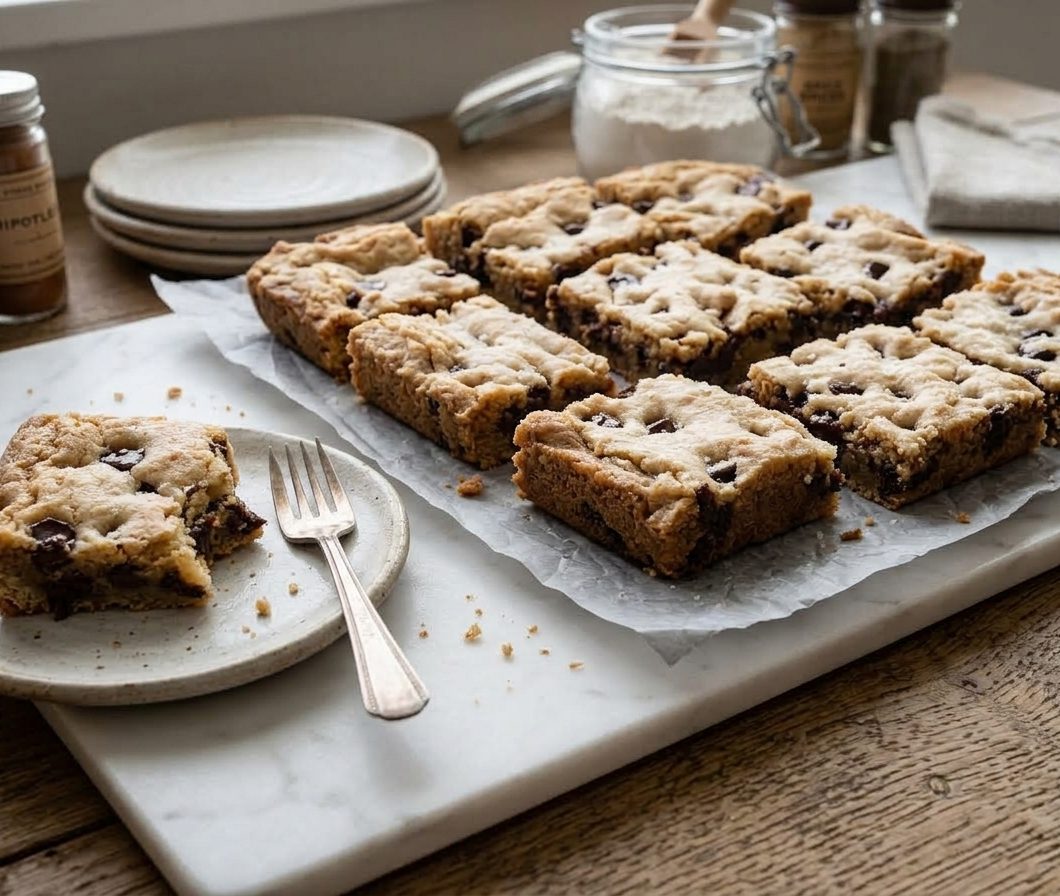
Gluten-free chocolate chip cookie bars are a simple way to enjoy the familiar flavor of homemade chocolate chip cookies without having to scoop individual portions of dough. These bars are soft, buttery, generously packed with chocolate chips, and baked together in one pan.
Instead of preparing multiple batches of cookies, you spread the dough into a baking pan, bake it until lightly golden, let it cool, and cut it into squares. The result is an easy gluten-free dessert that works well for weeknight baking, lunchbox treats, family gatherings, or whenever you want something sweet without spending a lot of time in the kitchen.
Why These Gluten-Free Cookie Bars Are So Easy
One of the best things about gluten-free chocolate chip cookie bars is the straightforward preparation. Traditional chocolate chip cookies often require portioning the dough into individual balls, arranging them on baking sheets, and baking several trays one after another.
Cookie bars remove those extra steps. The entire batch of dough goes directly into a prepared 9×13-inch pan, where it bakes evenly and develops a lightly golden surface. Once cooled, the large cookie can simply be divided into individual bars.
The texture also makes these bars especially appealing. They have the rich, buttery character associated with classic chocolate chip cookies, while the brown sugar contributes a deeper sweetness and subtle molasses flavor. Granulated sugar adds another layer of sweetness without overwhelming the buttery taste.
Chocolate chips are distributed throughout the dough, so each square contains plenty of chocolate. The finished bars are convenient, familiar, and easy enough for beginner bakers to prepare.
Choosing the Right Gluten-Free Flour
The gluten-free flour used in this recipe is an important part of the final texture. A gluten-free baking flour blend is designed to replace traditional wheat flour while providing a structure suitable for baked goods. The original recipe uses Bob’s Red Mill 1:1 Gluten-Free Baking Flour, and using the specified type of gluten-free flour helps maintain the intended consistency of the cookie bars.
Different gluten-free flour blends can contain different combinations of rice flour, starches, and other ingredients. Because of those differences, changing the flour can affect how thick, soft, chewy, or crumbly the bars become. For the most consistent results, use the gluten-free flour specified in the recipe. Measure it carefully and combine it thoroughly with the baking soda and salt before incorporating it into the wet ingredients.
The Role of Brown Sugar and Granulated Sugar
Using two types of sugar gives these gluten-free cookie bars their balanced sweetness and characteristic cookie flavor. Brown sugar provides moisture along with a mild molasses note, which helps create a richer taste. Both light and dark brown sugar can be used, although dark brown sugar produces a more noticeable molasses flavor.
A smaller amount of granulated sugar is also included. It provides additional sweetness and works alongside the brown sugar to create the familiar flavor of a chocolate chip cookie. Keeping the quantities balanced is important because sugar affects more than sweetness. It also contributes to the texture and browning of the finished bars, helping create the lightly golden exterior that makes these cookie bars so appealing.
Using Softened Butter
Softened butter is essential for making the dough smoothly. When butter is softened to the appropriate consistency, it combines easily with the brown sugar and granulated sugar, creating a thick and cohesive mixture. Cold butter can be difficult to blend evenly, while melted butter would change the consistency of the dough and alter the way the bars bake.
Salted butter can be used according to the original recipe, although the choice between salted and unsalted butter is often a matter of personal preference. The important point is that the butter should be softened rather than melted. This helps the ingredients combine properly and contributes to the rich, buttery flavor expected from a classic chocolate chip cookie bar.
Adding the Eggs and Vanilla
The eggs serve several purposes in this gluten-free dessert recipe. They help bind the ingredients together, provide structure, and contribute to the soft texture of the finished bars. Adding two large eggs gives the dough enough moisture and stability to spread into the baking pan while still holding its shape after baking.
Vanilla extract complements the brown sugar, butter, and chocolate chips. Although only a small amount is required, vanilla helps round out the overall flavor and makes the bars taste more like a classic homemade chocolate chip cookie. Once the eggs and vanilla are added to the butter and sugar mixture, they should be mixed until the mixture becomes fluffy before the dry ingredients are incorporated.
Combining the Dry Ingredients
The gluten-free flour, baking soda, and salt are added after the wet ingredients have been mixed. Baking soda provides the necessary lift, helping prevent the cookie bars from becoming overly dense. Salt plays an important supporting role by enhancing the flavors of the butter, sugar, vanilla, and chocolate.
When these ingredients are combined with the wet mixture, the result should be a thick cookie dough rather than a thin cake batter. Gluten-free dough can sometimes look slightly different from traditional cookie dough, but it should still be thick enough to spread into the prepared pan. Avoid overworking the mixture once the flour has been incorporated, as the goal is simply to bring everything together evenly.
Getting Chocolate Chips Into Every Bite
Chocolate chips are one of the defining ingredients in these cookie bars, so distributing them evenly is important. Once the dough has formed, stir the chocolate chips throughout the mixture. Take a moment to make sure there are no areas containing noticeably more or fewer chips than the rest of the dough.
Semi-sweet chocolate chips are the classic option and provide a pleasant balance against the sweet cookie base. The original ingredient list calls for chocolate chips, so the recipe remains flexible within that ingredient. Chocolate chunks or other suitable varieties can also work if desired, but the original quantity should remain unchanged when following the recipe as written.
Preparing the Baking Pan
Before adding the dough, prepare a 9×13-inch baking pan with nonstick cooking spray. This small step makes a difference when it is time to remove and cut the cookie bars. A well-prepared pan helps prevent the edges from sticking and allows the baked cookie to come away from the sides more easily.
Spread the dough into the pan and use a spatula or the back of a spoon to create an even layer. Taking a little extra time at this stage helps the bars bake consistently. If one section of the dough is significantly thicker than another, the thinner area may finish baking sooner while the thicker section remains soft.
Baking Gluten-Free Chocolate Chip Cookie Bars
Preheat the oven to 350°F before baking. A properly preheated oven gives the cookie dough the correct environment from the beginning and helps the bars bake evenly. Place the prepared pan in the oven and bake for approximately 30 minutes.
The finished cookie bars should have a lightly golden appearance. A cake tester inserted into the center should come out clean when the bars are finished. Baking time can vary slightly between ovens, so begin paying attention toward the end of the suggested baking time. Avoid judging doneness by color alone, since gluten-free baked goods can sometimes look different from wheat-based versions.
Let the Bars Cool Before Cutting
Allowing the cookie bars to cool in the pan is an important part of the process. Freshly baked cookie bars are soft and delicate, and cutting them immediately can cause them to break apart or lose their clean shape. As they cool, the structure becomes firmer and easier to handle.
Once the bars have cooled sufficiently, cut the slab into 12 portions. A sharp knife will help create cleaner edges. You can cut them into equal squares or rectangles depending on how you prefer to serve them. Because the entire recipe is baked in one pan, portioning is much faster than shaping individual cookies.
Dairy-Free Variation
These cookie bars can also be adapted for a dairy-free diet without changing the basic preparation method. For the dairy-free version, replace the butter with a dairy-free buttery spread that is suitable for baking. You should also use dairy-free chocolate chips.
These substitutions are specifically intended to make the recipe dairy-free while keeping it gluten-free. When selecting replacement products, choose options designed for baking so their texture and performance are appropriate for the recipe. Since different dairy-free spreads can behave differently in baked goods, following the product’s intended baking use is helpful for achieving the best possible result.
How to Store Gluten-Free Cookie Bars
Once completely cooled, leftover gluten-free chocolate chip cookie bars can be wrapped tightly and kept at room temperature for up to four days. Keeping them covered helps protect the texture and prevents them from becoming unnecessarily dry. A sealed container or tightly wrapped portions can make storage more convenient.
These cookie bars are also suitable for freezing. To freeze them, allow the baked bars to cool completely before placing them into a freezer-safe container. If stacking multiple layers, place parchment paper between the layers so the bars do not stick together. They can be frozen for up to four months, making them a useful make-ahead dessert for busy days or future cravings.
Notes for the Best Results
For consistently good gluten-free chocolate chip cookie bars, begin with properly softened butter rather than melted butter. Use the recommended gluten-free flour blend when possible, because different blends can produce noticeably different textures. Spread the dough evenly across the baking pan so the bars bake at a similar rate from edge to center. Finally, allow the baked cookie to cool before slicing so the pieces hold together neatly.
The chocolate chips should be mixed thoroughly into the dough rather than added only to the surface. This ensures the chocolate is distributed throughout the finished bars. If you are preparing the dairy-free variation, make both required substitutions—dairy-free buttery spread and dairy-free chocolate chips—rather than changing only one ingredient.
A Simple Gluten-Free Dessert for Any Occasion
These gluten-free chocolate chip cookie bars are especially useful when you want a homemade dessert without a complicated preparation process. The recipe uses familiar pantry ingredients and requires only one baking pan, making it practical for everyday baking. Their combination of buttery cookie dough, brown sugar sweetness, vanilla, and chocolate chips gives them the comforting flavor of a traditional chocolate chip cookie in a more convenient bar format.
Whether served as an afternoon treat, packed for a casual snack, or prepared ahead for a gathering, these bars are easy to portion and share. Their simple preparation also makes them a good choice when you want to bake something homemade without spending a long time shaping individual cookies. Once you try the one-pan approach, it is easy to see why cookie bars are such a convenient alternative to traditional cookies.
Gluten-Free Chocolate Chip Cookie Bars
 Recipe by admin
Soft and buttery gluten-free chocolate chip cookie bars made with brown sugar, vanilla, and plenty of chocolate chips.
12
servings15
minutes30
minutes45
minutesIngredients
Nonstick cooking spray
2 sticks butter, softened (8 ounces; 226 grams)
1 cup packed light brown sugar (7 ½ ounces; 213 grams)
¼ cup granulated sugar (2 ounces; 56 grams)
2 large eggs
1 teaspoon vanilla extract
2 ¼ cups gluten-free flour (10 ounces; 284 grams)
1 teaspoon baking soda
1 teaspoon salt
2 cups chocolate chips (one 12-ounce package)
Directions
- Preheat the oven to 350°F. Coat a 9×13-inch baking pan with nonstick cooking spray.
- Add the softened butter, brown sugar, and granulated sugar to a large mixing bowl. Mix until the ingredients are well combined and thick, about 30 seconds.
- Add the eggs and vanilla extract. Continue mixing until the mixture becomes fluffy.
- Add the gluten-free flour, baking soda, and salt. Mix until a thick cookie dough forms.
- Fold the chocolate chips into the dough, distributing them evenly throughout.
- Transfer the dough to the prepared baking pan. Spread it evenly across the pan so the cookie bars bake uniformly.
- Bake for approximately 30 minutes, or until the top is lightly golden and a cake tester inserted into the center comes out clean.
- Remove the pan from the oven and allow the cookie bars to cool in the pan.
- Once cooled, cut into 12 bars and serve.
Notes
- Dairy-Free Variation: Replace the butter with a dairy-free buttery spread suitable for baking and use dairy-free chocolate chips.
- Storage: Wrap leftover bars tightly and keep them at room temperature for up to 4 days. For longer storage, freeze in a freezer-safe container for up to 4 months, placing parchment between layers.